
 The Road to Baldur’s Gate has led our characters back to the Trade Way, the mighty road upon which they first began this journey. However, things have become a bit more dire since the last time they walked upon this historic road. Now, the characters have been tasked with delivering news of the attack at Boareskyr Bridge to High Overseer Thavius Kreeg in Elturel. Even if they decide to brush off this duty (after all, it’s not really their problem unless they want it to be), the roads of Elturgard have grown dangerous. Demon cults have bubbled up from the darkest recesses of the land, and chaos seeks to poison the heart of Elturel itself.
This week’s encounter is titled Deathly Demons! The characters’ next stop on the road is a little farming community called Triel—the perfect place for cultists of Orcus to attempt a summoning in secret. This encounter is part of the series “The Road to Baldur’s Gate,” in which a group of adventurers will travel down the Sword Coast over road and wilderness, from the gates of Waterdeep to the threshold of Baldur’s Gate. You may use this series as an introduction to the upcoming D&D storyline Baldur’s Gate: Descent into Avernus, as an expansion to the caravan sequence in the first D&D storyline adventure, Hoard of the Dragon Queen, or piecemeal as standalone encounters.
You can keep track of this journey on this massive map of the Sword Coast, originally presented in the Sword Coast Adventurer’s Guide. The trip from Waterdeep to Baldur’s Gate covers about 750 miles of both road and off-road wilderness. A small party on horseback can cover about 24 miles per day at a casual pace, with just under two days off for rest per tenday of travel. All in all, this journey takes just over a month to complete for a small party of adventurers—assuming they’re well-prepared and no serious complications arise. And note, not every day of travel needs to be represented by an encounter; the characters may go for days with only minor encounters with passing merchants or travelers.
This is the ninth encounter along this journey. The previous encounters are:
- The Road to Baldur’s Gate
- Devil in the Details
- Danger in Daggerford
- Misty Marauders
- Detour Past Dragonspear
- Trollclaw Terrors
- A Break at Boareskyr Bridge
- Najaran Nemeses
Leveling Advice
The characters should be at least 3rd level by the time they begin this encounter. Though this encounter series is supposed to lead directly into Baldur’s Gate: Descent into Avernus, that adventure begins its characters at 1st level. You can choose one of the following options, or create your own plan, in order to make this series flow smoothly into Descent into Avernus:
- Treat this series as a prologue, and start Descent into Avernus fresh at 1st level with new characters
- Scale up the Baldur's Gate content in Descent into Avernus from 1st to 3rd level, and slow XP gain down significantly by halving or even quartering XP values until they reach Avernus.
- Skip the Baldur's Gate content and go straight to Avernus.
Combat Encounter: Deathly Demons!
This combat encounter is suitable for characters of 3rd level. If the characters decide to ignore the plot hook, it could come back to bite them when they’re faced with a deadlier encounter later on!
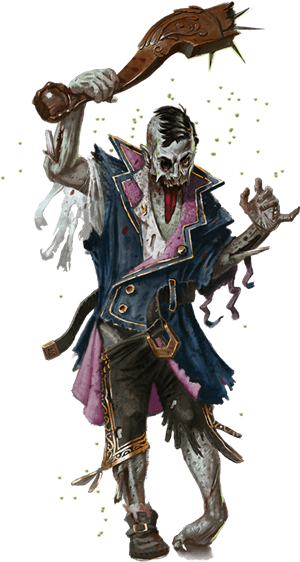
The central monster of this encounter is a dybbuk, a corpse-puppeteer demon from Mordenkainen’s Tome of Foes. If you don’t have this book, you can use the game statistics of a ghost, with the following change: the ghost can only use its Possession ability on corpses, which automatically fail their saves to resist this ability.
Encounter Start
 As the characters walk through the wilderness, read or paraphrase the following:
After several grueling days of travel through the wilderness, you’re finally back on the Trade Way. The last few days of travel have passed without incident. Today, however… you have a bad feeling about today. The sky is dark and cloudy and threatens rain. Even the air of the holy realm of Elturgard feels sickly on this day.
Then you hear it. A scream, coming from the low-lying hills to the west. A bloodcurdling scream. What do you do?
If the characters ignore this hook, don’t force them to follow the plot. Let them travel along towards Triel without trouble. If they do search out the origin of the shriek, however, they depart from the road and travel into the hills. A character that succeeds on a DC 11 Wisdom (Survival) check spots fresh footprints in the mud, and a character that succeeds on this check by 5 or more notices faint drag marks—as if someone were being dragged up the hills against their will. A character that succeeds on this check by 10 or more finds an insignia buried in the muck—a silver pin in the shape of a shield, bearing the symbol of a horse’s head.
A character that succeeds on a DC 15 Intelligence (History or Religion) check recognizes this symbol as the icon of the Hellriders, an order of Elturgardian knights that were said to have rode into Avernus itself to join the Blood War and smite both demons and devils alike. Though these Hellriders are just those brave warriors’ descendants, they still are among the greatest warriors in all the Sword Coast.
Vile Acts of the Cult of Orcus
Atop a nearby hill lairs a cult worshiping Orcus, Demon Prince of Undeath. Last night, the cultists ambushed a Hellrider named Sir Emarkos; the knight was wounded in a battle with a troll, and was riding back to Elturel to recover. He was ambushed by the cultists, and was bound, gagged, and taken to their hilltop shrine to be ritually sacrificed to their horrible demigod.
The leader of the cult is a scrawny half-orc with a pitiful, scraggly beard named Gasthyr, and his lieutenant is a human with a pale complexion and dark bags under his eyes named Heelon. Both men are cult fanatics. Gasthyr wears a brooch stolen from the Hellrider. If the characters examine it, they find that this brooch matches the insignia they found earlier—a shield bearing a horse’s head, though the brooch is slightly larger than the pin. This emblem of the Hellriders of Elturel is enchanted with protective magic: it’s a brooch of shielding.
Camp of the Cult of Orcus
 At the top of one of the barren, rocky hills near Triel are three weather-worn standing stones. These monuments were once a shrine to the Triad, the three allied gods known as Torm, Tyr, and Ilmater. These stones were forgotten after some ancient war, and their once-hallowed ground has been desecrated by a cult venerating the Demon Lord Orcus. The three stones are each twenty feet tall, and form a triangle fifty feet on each side. In the center of this triangle is a stone slab, just large enough to fit an adult human.
The two cult fanatics, their four cultists, and their two mastiffs stand within the triangle. The knight known as Sir Emarkos is unconscious, stripped of armor, bound, and gagged, and has been laid upon the stone slab. His screams drew the party to this location; he has had horrible, profane sigils carved into his chest by Gasthyr’s ritual dagger. When the characters arrive, Gasthyr stands over Emarkos, his dagger raised high. If they do not interfere immediately, the cult leader plunges the knife into the knight’s chest, killing him instantly and sacrificing him to Orcus. Gasthyr or Heelon flees the ritual site if the other is defeated, and hides in the wilderness until nightfall, whereupon he returns to Triel in secret.
If Emarkos is killed upon the slab, a crackling gateway to the Abyss rends itself open in the air between the stones, and a wispy, jellyfish-like demon called a dybbuk drifts through. The four cultists collapse to the ground as their spirits are wrenched from their bodies, and drift into the portal. Finally, tenebrous energy crackles around the two mastiffs, and they whine and bellow as they are painfully transformed into shadow mastiffs. The dybbuk then possesses the knight’s corpse, and the surviving cult leaders point it towards Triel, where it can cause unfettered chaos.
If Emarkos is saved, none of the terrible things described above come to pass, and he thanks the characters for their heroism. He urges them to avoid Triel, as it’s where these cultists came from. As for him, he casts find steed and calls his faithful warhorse Luxio to his side. He smiles upon the characters and says that he will find a way to help them if they ever find him in Elturel.
Did you know? You can play this encounter using the D&D Beyond Encounter Builder!
Trouble in Triel
 It’s okay if the characters ignored the hook. They arrive in Triel late that night without trouble. However, while they rest for the night in the village, the knight returns. The knight’s corpse staggers into the streets, puppeteered by the dybbuk summoned by the cultists of Orcus that assembled north of town. The demon is accompanied by two faithful shadow mastiffs that have been ordered to wait to kill until the dybbuk itself starts to kill. The shadow mastiffs quickly leave the center of town to hunt fleeing villagers, but one of them returns to the dybbuk’s side if its demonic master is attacked, returning at the start of the second round of combat.
The characters are wakened in the night when the dybbuk breaks into a local weaver’s house and terrorizes the family within by throwing up gouts of blood, excreting piles of squirming maggots, and contorting its host’s limbs in impossible ways as it scuttles across the ground.
A crowd of at least ten horrified villagers gathers outside the house in about five minutes. Once this crowd has assembled, the dybbuk stops playing with its food and starts to kill. It draws the knight’s longsword and starts hacking through the clustered commoners. The still night rings with manic laughter and the bloodcurdling screams of the dead. If the characters wish to help, just remember that they’ve probably been sleeping—and if they take the time to don their armor, two dozen people will have already died. If left unchecked for ten minutes (the time it takes to don a suit of heavy armor), the dybbuk will have ravaged Triel, killing dozens while any survivors flee to outlying farmhouses and hide in their cellars.
Did you know? You can play this encounter using the D&D Beyond Encounter Builder!
Conclusion
If the characters defeated the cultists and rested in Triel that night, the villagers enjoy their story of defeating a cult of Orcus-worshipers, but laugh it off as mere fiction. Demon cults? In Elturgard? What a ridiculous story. If one of the cult leaders escaped in the encounter atop the ritual hill, a character with a passive Wisdom (Perception) score of 18 or higher notices a figure quietly slip out through the front door of the inn as the crowd laughs. This clandestine cultist is either Heelon or Gasthyr, depending on who escaped. Let the characters deal with him as they see fit. Note that Gasthyr still wears the brooch of shielding as described above, and he offers it to the characters in exchange for his life if he is threatened.
If the characters failed to prevent the cultists' ritual, but managed to kill the dybbuk before it razed the village of to the ground, the Trieltans thank the characters profusely for their heroism. The mayor of the village presents them with a gem of brightness that another group of adventurers had unwittingly used to pay for armor and supplies when they passed through a few tendays ago.
Did you like this encounter? If you want to read more adventures, take a look at the other encounters in the Encounter of the Week series! If you're looking for full adventures instead of short encounters, you can pick up the adventures I've written on the DMs Guild, such as The Temple of Shattered Minds, a suspenseful eldritch mystery with a mind flayer villain (for 3rd level characters). My most recent adventures are included in the Platinum Bestseller Tactical Maps: Adventure Atlas, a collection of 88 unique encounters created by the Guild Adepts, which can be paired with the beautiful tactical poster maps in Tactical Maps Reincarnated, recently published by Wizards of the Coast.
 James Haeck is the lead writer for D&D Beyond, the co-author of Waterdeep: Dragon Heist and the Critical Role Tal'Dorei Campaign Setting, the DM of Worlds Apart, and a freelance writer for Wizards of the Coast, the D&D Adventurers League, and Kobold Press. He lives in Seattle, Washington with his partner Hannah and their feline adventurers Mei and Marzipan. You can usually find him wasting time on Twitter at @jamesjhaeck.
-
View User Profile
-
Send Message
Posted Jul 23, 2019This comment isn't wrong. The encounter was revised thanks to hstein3's feedback. =)
-
View User Profile
-
Send Message
Posted Jul 24, 2019If you ask me, pip kip would urge you to kill the dybbuk. Also, I think he could tell you what the soul coin is.
-
View User Profile
-
Send Message
Posted Jul 24, 2019Wow, dybbuks. I know that the Mighty Nein had a lot of trouble with those. Definitely an interesting encounter.
-
View User Profile
-
Send Message
Posted Jul 24, 2019I saw a donut a d on this it said "Icing on the cake" dnd =cake encounter = Icing not coincidental right ?
-
View User Profile
-
Send Message
Posted Jul 25, 2019My favourite encounter has to be James.... Lol
-
View User Profile
-
Send Message
Posted Jul 26, 2019the dybbuk has inspired me to use this encounter as a hook in a game for a level 3 party of new players. I really like this encounter! Going to have it sit up facing away from the party if they don't engage immediately and use its "Violate Corpse" ability to turn it's head around on the body and talk telepathically to the party lol.
-
View User Profile
-
Send Message
Posted Jul 26, 2019@hstein3 They say that if the characters intervene, Heelon or Gasthyr run away when the other is killed.
-
View User Profile
-
Send Message
Posted Jul 27, 2019During the encounter atop the ritual site one leader flees if the other is defeated.
-
View User Profile
-
Send Message
Posted Jul 29, 2019"Gasthyr or Heelon flees the ritual site if the other is defeated, and hides in the wilderness until nightfall, whereupon he returns to Triel in secret." So I'm assuming that at the start of the cultist encounter, as soon as one of them dies the other one runs off. If the party kills the one that runs off, then yeah he won't show up. But I'm assuming it's meant to be that they try to escape. For example, I would run this as though Heelon was on the edge of the clearing watching and runs the second intruders are detected/ someone dies. Anyways hope this helps.
-
View User Profile
-
Send Message
Posted Jul 30, 2019I always enjoy the Encounter of the Week articles, and I've especially been enjoying this series. It's really getting me revved up for the new campaign book. I noticed that since the 5th or so encounter you've suggested that DMs scale up the encounters in Descent into Avernus (DiA?) from level 1 to level 3, will there be any support/recommendations for how to scale up the encounters and challenges within the campaign book itself?
I only ask because I had the bright idea of running Waterdeep: Dragon Heist for my group starting at level 5, and while I enjoyed thinking about how to make the combat and skill elements of the book challenging enough to match my player's levels (5-10 respectively), it was a fair bit of work to do.
-
View User Profile
-
Send Message
Posted Aug 28, 2019I’m planning on running this as a one shot at my LGS.
Im going to have them meet a paladin of the the raven queen hunting this cult on the road. Let them rp with the pali before they attempt to save him. Hopefully he’s likable enough. Party may choose to accompany him and get ambushed.
Might throw the Zemmy encounter at them the day before to start them out with some light hearted rp and a chance for some buffs (blessings from a pleased copper dragon)
-
View User Profile
-
Send Message
Posted Aug 28, 2019What does a dybbuk look like when it isn't possessing a corpse?
-
View User Profile
-
Send Message
Posted Aug 28, 2019Check it's description! It's like an ethereal jellyfish.
-
View User Profile
-
Send Message
Posted Oct 25, 2019The knight says to avoid Triel? Isn't there a Hellrider outpost there? Where was he coming from and where was he going?