


"Chapter 4: Devastation’s Light," is one of the coolest and most challenging chapters to run in Icewind Dale: Rime of the Frostmaiden. Before we go any further, let’s drop a big, chonky SPOILER WARNING. This article is for Dungeon Masters’ eyes only as it contains massive spoilers for chapters 3 and 4 of Icewind Dale: Rime of the Frostmaiden. If you’re a player in an Icewind Dale campaign, reading this article any further will ruin your experience of one of the most interesting encounters in the book.
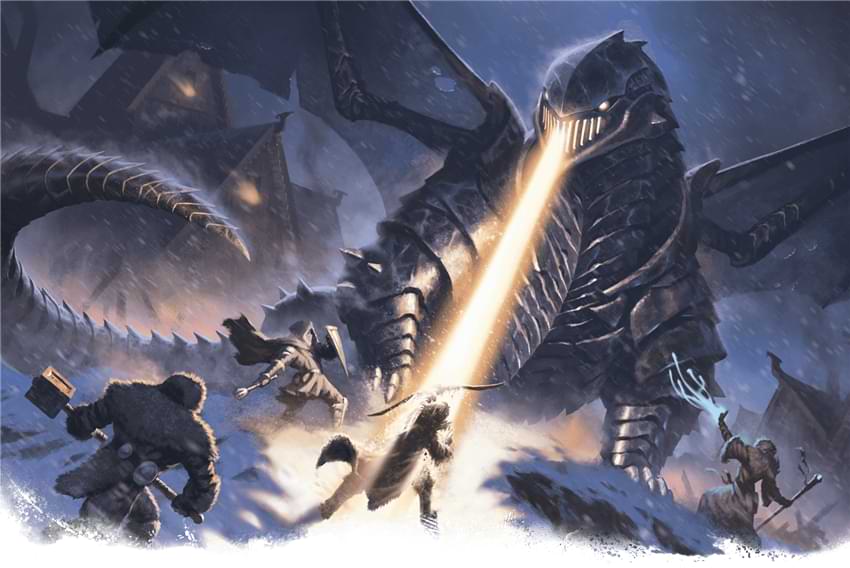
A dragon of black ice
Though Auril the Frostmaiden is the source of Icewind Dale’s greatest woes, many of the problems which plague Ten-Towns in chapter 1 of this adventure are actually the work of a duergar named Xardorok Sunblight. Many of the numerous episodic events that take place over the course of chapters 1 and 2 eventually lead the characters to the Sunblight fortress in chapter 3, where they have the opportunity to see the fearsome chardalyn dragon firsthand — just as it takes off into the skies of Icewind Dale to rain destruction down upon Ten-Towns.
This monster is a challenge 11 creature — not too strong in the grand scheme of the Monster Manual, but a terrifying foe for the party of 5th- or 6th-level characters that just watched it burst free of Sunblight fortress and take wing into the eternal nighttime sky! It’s a construct that follows its creator’s evil commands with dull, malevolent delight. Even though it’s little more than a weapon, the chardalyn that this dragon was crafted from is infused with demonic power, giving the chardalyn dragon a hateful, sadistic personality.
The shape of 'Devastation’s Light'
The race to stop Xardorok Sunblight’s ultimate weapon from annihilating Ten-Towns — and any hope of stopping him from creating his surface-empire — is the focus of chapter 4: Devastation’s Light. This chapter gives the characters the choice to pursue the dragon from town to town to force it to break off its attack, or preparing the fortified town of Bryn Shander for the thousands of refugees who will pour in from the other towns, and for the dragon’s final attack. This scenario is a mix of tense planning, frantic travel, and thrilling combat!
In this chapter, a number of different things can happen. This chapter isn’t described in a perfectly linear fashion, since the players are able to dictate the shape of the story by choosing to pursue the dragon or by hunkering down to ambush it. Here’s a rough timeline of the events of the chapter:
- The chardalyn dragon leaves Sunblight and flies to the town of Dougan’s Hole (2 hours)
- The dragon attacks each of Ten-Towns’ settlements in turn (see “Dragon Flight Path” in chapter 4 of Icewind Dale: Rime of the Frostmaiden)
- The dragon attacks the final town of Bryn Shander
- The dragon returns to Sunblight for repairs, if possible
- If Xardorok Sunblight lives, his scouts assess the damage to Ten-Towns
- If needed, Xardorok commands the dragon to repeat its attack run and wipe out any survivors.
The way the characters act in the events of the first bullet in this list — the dragon beginning its attack run on Ten-Towns — set the parameters for the entirety of the chapter. The dragon departs Sunblight just as the characters approach, and they are faced with a choice that will have grim consequences for all of Icewind Dale: continue their assault on Sunblight, or pursue the dragon. If they continue their assault, they may find the plans for the dragon’s flight path in Xardorok Sunblight’s war room (area X4 in chapter 3). This may happen only a few minutes into their attack, so they’re faced with another choice. Armed with critical knowledge of the dragon’s attack pattern, will they abort their attack now, and risk a tougher, more fortified attack in the future? Or will they double down on their decision to leave Ten-Town to its fate?
If they let Ten-Towns burn, then they will return to find Bryn Shander a smoking ruin, crawling with duergar warriors as a paltry 300 survivors hide in the wreckage. The dragon returns to finish the job later — I’d say a tenday — giving the characters a chance, if they wish, to drive out the duergar, rebuke Sunblight’s scouts, and fortify the ruins for the chardalyn dragon’s final attack. The book has no advice on how to create encounters with duergar thugs or how to fortify a ruined Bryn Shander. You’ll have the chance to flex your creative muscles by creating encounters for this new subplot.
If the characters chase the dragon, things get tricky. This entire chapter meticulously plans out the time it takes for the dragon to reach each settlement, destroy it, and move on to the next one. This is great; it ostensibly lets the characters plan their own open-ended approach to defeating the dragon. The characters are even greeted by the mystical Vellynne Harpell, a member of the Arcane Brotherhood who wants to help the characters — so that they’ll owe her a debt of gratitude later. She has dogsleds that will help the characters get back to town on time!
Except, this isn’t actually the case. As written, sled dogs travel at twice the speed (1 mph) of a character walking in snowshoes (½ mph), but they must take an hour-long short rest after every hour they spend pulling a sled, or they gain a level of exhaustion. So, over long distances, they’re no faster than walking; they’re mostly useful for carrying equipment and plunder. And there’s a vast distance of 10 miles between Sunblight and the first town on the chardalyn dragon’s flight path: Dougan’s Hole. Traveling on foot or with Vellynne doesn’t make a difference; it takes them 20 hours of grueling travel to reach the craterous ruin of Dougan’s Hole.
After 20 hours of uninterrupted travel (with a generous presumption of the characters taking fitful long rests in shifts as they ride across the snow), the chardalyn dragon will have just reached the town of Termalaine, having already reached and annihilated Dougan’s Hole, Good Mead, Easthaven, Caer-Dineval, and Caer-Konig, five of the ten towns. To make matters worse, they’re still in Dougan’s Hole, the southernmost town, and the dragon has just reached one of the northernmost towns! There’s simply no way to do any of the ambushing or planning that the book expects of you — fortifying Bryn Shander for attack while refugees spill in from the other nine towns is the only feasible option.
If you want your players to feel constant, devastating pressure from this encounter, you can keep the scenario as-is. It’s an absolutely brutal situation. If you would prefer your players to have the freedom to plan and launch their own counterattacks against the dragon rather than going on a bleak death march, only to find 90% of Ten-Towns in ruins, here’s an alternative option.
Vellynne’s undying dogs
Rumor has it that in an early draft of Icewind Dale: Rime of the Frostmaiden, Vellynne Harpell’s sleds were driven by undead sled dogs. This makes sense; she already has a small cadre of undead kobold lackeys, the cold and uncaring Harpell would likely have zombie dogs pulling her sleds! These dogs are immune to exhaustion and can run ceaselessly, cutting the grueling 20-hour slog from Sunblight to Dougan’s Hole to a much more manageable 10-hour ride across the snow.
In this scenario, the dragon is in the midst of destroying Easthaven when the characters arrive at Dougan’s Hole. The dragon reached Easthaven after 5 hours of destroying Dougan’s Hole and Good Mead, and is 5 hours deep in an 8-hour long attack run on the fortified town. Ten miles of clear road separate Dougan’s Hole and Easthaven. Since the characters aren’t traveling over the tundra anymore, their sleds can travel at a fast overland pace of 4 miles per hour. At this quick clip, the characters can Easthaven just before its final defenses fail, allowing them to potentially save a handful of lives (though who exactly is saved is left to the DM’s discretion) and force the dragon to flee — as the dragon flees a town after taking 30 damage from the characters.
The characters can’t match the dragon’s pace as it flies from town to town, partially because of its speed, but also because it moves as the crow flies, rather than being restricted to roads. They can try to chase the dragon to Caer-Dineval and Caer-Konig with some success, but their luck runs out when dragon swoops across the Dwarven Valley from Caer-Konig to Termalaine. This journey takes the dragon 2 hours on wing, but traveling cross-tundra forces the already tired characters to spend a brutal 12 hours on Vellynne’s dogsleds — and the circuitous journey by road is no faster.
Ultimately, granting Vellynne Harpell the undead sled dogs she is rumored to have had in the early draft of this adventure affords your players the ability to make more dynamic decisions in this encounter, rather than being faced with the grim reality that all of Ten-Towns, save Bryn Shander, is beyond salvation. You can use either option — but I recommend giving the players the chance to truly be heroes at this climactic mid-point of the adventure!
Playing the chardalyn dragon
The chardalyn dragon is a superweapon, and battling it should feel like you’re up against unstoppable odds — like a group of four people going toe-to-toe with an AT-AT walker on Hoth. Any monster in D&D has two broad elements that you should try to master before playing it: its statistics and its personality.
Personality. Discussed briefly above, the chardalyn dragon has a simple personality and motivation. Its goal is to annihilate Ten-Towns, and the demonic influence of its chardalyn body makes it a sadistic, predatory monster. It fights to the death if forced, but would sooner flee from town to town to continue causing destruction unhindered by meddling adventurers. Its demonic malevolence causes it to enjoy spreading terror and pain, meaning that it may pause to toy with the heroes the first couple of times they face it — but its dutiful nature means that in later encounters, it might fight them in earnest, trying to seriously wipe them out. They are the single greatest obstacles in the way of it completing its master’s wishes, after all.
Combat Statistics. Be sure to have read the chardalyn dragon’s stat block thoroughly before playing it. To help you separate the wheat from the chaff, here are the dragon’s most important combat features:
- Its 90-foot flying speed. This speed means that it can almost always outpace the characters, making pursuing it a fool’s errand. Be sure to emphasize to your players how fast this thing is, compared to them!
- Its Magic Resistance. Your players may prepare spells like earthbind if they know they’re going to be fighting a flying dragon! This monster doesn’t have Legendary Resistances to ignore the effects of powerful spells, but it does have advantage on all saving throws against magic! (And for the record, this trait combined with its +11 bonus to Strength saving throws means the chardalyn dragon probably won’t be falling prey to earthbind any time soon. Probably.)
- Its Malevolent Presence. This horrific ability channels the demonic power of the dragon’s chardalyn body into nearby intelligent creatures, causing them to turn into hateful mob that attacks anything the dragon wishes. If this trait turns some of the heroes against each other as the dragon arrives, it could spell doom for their well-laid ambush plans.
- Its Radiant Breath. This breath weapon is relatively underpowered for the dragon’s challenge rating, but its incredible 120-foot range means that the chardalyn dragon can opt to simply avoid the heroes entirely, fleeing from them with its 90-foot fly speed, smashing weaker targets, and shooting its Radiant Breath behind it as the characters try to catch up.
Dragon tactics
In early encounters, while the dragon is toying with the characters, it tries to get up close and personal to see the suffering on its foes’ faces, and to watch the light fade from their eyes. It tries to avoid ending its turn on the ground, preferring to swoop in and launch a flurry of attacks, then swoop away. It may take an opportunity attack on the way out, but those single hits are worth it to avoid getting cornered on the ground.
If you think the characters will encounter the dragon more than once, hold back its Malevolent Presence for now. If a character succeeds on its saving throw against Malevolent Presence, it becomes immune to the effect for the next 24 hours. One way to keep the multiple dragon encounters fresh and interesting is to hold back its Malevolent Presence until the second time the characters encounter it. Then, in the second encounter, the dragon can begin the fight by using its Malevolent Presence (hopefully catching all of the characters in its area), and then cackling with malicious glee as they begin to fight one another. And while the characters are busy battling one another, the dragon continues in its attack against the town.
In the midst of an encounter focused around the dragon’s Malevolent Presence, you can turn up the heat by having a crisis arise as the result of the dragon’s devastation. You can draw these crises from the “Other Things Characters Can Do” section of chapter 4.
In the characters’ final confrontation with the dragon (which, depending on their actions, may also be their first and only encounter with it), the dragon fights with demonic savagery. It stays airborne as much as possible, using its Radiant Breath to blast the characters from afar and force them to find clever was of damaging it.
If this final showdown takes place in Bryn Shander, consider having the dragon fight to the death here to give the adventure a more heroic tone. You could shape the final encounter in two parts: one in which the characters must deal damage to the dragon as it ignores them, destroying the town, until it is reduced to half its hit point maximum. Then, a second part where it turns its full destructive attention upon the characters and fights them to the death. In the first part, waves of duergar (use D&D Beyond's Encounters tool to create medium-difficulty encounters using the new duergar stat blocks in appendix C of Icewind Dale: Rime of the Frostmaiden) harry the characters as they chase their flying foe throughout Bryn Shander. Then, once it’s reduced to half its hit point maximum, it attacks the characters directly, using every tool at its disposal to kill them without being killed itself.
It wreaks as much devastation as it can, extinguishing as many innocent lives as possible before the heroes eventually bring it down. Despite all the losses, all of the death, and all the hardship yet to come, the heroes have won. Or perhaps, if their plans were not enough, or if the dice failed them, their lives were snuffed out along with the lights of Ten-Towns.
Have you ever run a complicated boss battle? How would you run this encounter with the chardalyn dragon? Let us know in the comments below!
James Haeck (@jamesjhaeck) is a former lead writer for D&D Beyond, the co-author of Waterdeep: Dragon Heist, Baldur's Gate: Descent into Avernus, and the Critical Role Explorer's Guide to Wildemount, a member of the Guild Adepts, and a freelance writer for Wizards of the Coast, the D&D Adventurers League, and other RPG companies. He lives in Seattle, Washington with his fiancée Hannah and their animal companions Mei and Marzipan.
-
View User Profile
-
Send Message
Posted Oct 7, 2020A pretty amazing article, I must say! I only worry though that the descriptive text for this article isn't enough for glancers to look away (the hardcover title being mentioned immediately after "spoiler alert" doesn't do any favors); especially since all my players in my RotF campaign use D&D Beyond. Nonetheless, this makes me excited to run this chapter all the more!
-
View User Profile
-
Send Message
Posted Oct 7, 2020Please stop putting spoilers on the front page of beyond.
The site is spoiling something new about the campaign every week at this point, and this is ONE OF THE BIGGEST surprises in the campaign. Please, if you can't retitle the article and change the picture, please take the article down. It's not worth using beyond if the site is going to spoil everything.
What am I supposed to do to prevent my players from getting spoiled? Tell them not to use the site their characters are on? Not to go to its HOME PAGE?
Like wtf dude, uncool.
Edit: Thank you for fixing the title.
-
View User Profile
-
Send Message
Posted Oct 7, 2020Dang, I have been excited for a new running monsters! I love this series. Great article!
-
View User Profile
-
Send Message
Posted Oct 7, 2020Can they stop with the Icewind Dale... I had thought it was over. I am not looking forward with what they would do with Tashas Cauldron of Everything.
-
View User Profile
-
Send Message
Posted Oct 7, 2020I mean, I do love Icewind dale, but I agree, this is a bit too much.
-
View User Profile
-
Send Message
Posted Oct 7, 2020I mean, I am not letting a town called good mead be destroyed.
-
View User Profile
-
Send Message
Posted Oct 7, 2020I agree with the general sentiment here. As a DM for RotF, I worry a lot about my players seeing this article, even just the title, and having it spoiled for them.
-
View User Profile
-
Send Message
Posted Oct 7, 2020I honestly don't have a problem with this many posts on Icewind Dale. I understand that it gets a little bit frustrating with all of the spoilers, but if you are having problems with your players seeing the spoilers, then talk to them about it. It shouldn't be a problem as long as your players are trustworthy enough to not read them. If they read the posts anyway, then they probably shouldn't even be in your campaign in the first place.
Also, I really like the Charladyn Dragon. It has inspired me to make my own dragon-like creature of similar makes, just of a different metal.
-
View User Profile
-
Send Message
Posted Oct 7, 2020I mean they are gonna call it Tasha's cauldron of everything, but next thing you know, a new adventure comes out. Still, not complaining, I like that the theme that not one being knows everything. (and yes I know it's just branding)
-
View User Profile
-
Send Message
Posted Oct 7, 2020I agree about the front page spoiler issues, but otherwise want to thank you for the useful article/suggestions. I suspect this is an oversight in the revision and editing process (not the first one in a WotC campaign): they would not have carefully mapped out these flight times if you weren't expected to be able to intercept it at some point. And I think that in most campaigns, we want to give characters meaningful choices.
-
View User Profile
-
Send Message
Posted Oct 7, 2020this is so true and do to this our group has voted to wait on icewind till later they are done
-
View User Profile
-
Send Message
Posted Oct 7, 2020I've been trying to figure out how the PCs could possibly win.....if the dragon stays in the air, what can they really do? Also, I'd like them to be able to do more damage along the way...as this article suggests. I'd want them to have some time in most every town to fight it, feeling more and more like they can't win, but can't give up, town after town....
-
View User Profile
-
Send Message
Posted Oct 7, 2020do not read samuel curry to many spoilers for my adventure
-
View User Profile
-
Send Message
Posted Oct 7, 2020Usually the pearl clutching over spoilers is over the top, but the title and summary of this article that displays BEFORE YOU EVEN CLICK ON IT gives away a major spoiler for this campaign. And worse, it's a major event that is teased throughout the adventure, but which players don't have a real way of connecting the dots on until it comes to pass.... once this spoiler is in their brain, the full significance of every earlier encounter with Duergar hunting Chardalyn is laid bare and the suspense dissipated.
The article is fine, you click on a spoiler article you get a spoiler.... but the title and preview text is a major blunder, and not worthy of the front page, because it forcibly downloads that spoiler to everyone who goes to dndbeyond.
-
View User Profile
-
Send Message
Posted Oct 7, 2020Since its beginning, DND Beyond has been running articles like this one about every new official WOTC adventure. Perhaps tell your players to behave like adults and exercise some impulse control, and avoid reading articles that have clear spoiler warnings at the very beginning. It’s no secret there is a dragon somewhere in the adventure, every review talked about it—-not to mention, the game is called Dungeons & Dragons. Or, if you are that paranoid, don’t use DNDBeyond. 99.9999% of the rest of the users seem to be just fine with things.
-
View User Profile
-
Send Message
Posted Oct 7, 2020Hey folks, thanks for letting me know about your concern for the title of this article. I've removed the spoiler from the title, so that D&D Beyond is once more safe for your players to browse. Cheers!
-
View User Profile
-
Send Message
Posted Oct 7, 2020Given the time constraints, it was a mistake for the book to present this as a moral dilemma at all. There's no reason to make the players feel guilty for failing to complete an impossible task. And no reason to try to retcon it by making the deus ex machina character even more of a deus ex machina with magic sled dogs.
The more rewarding thing to do, imo, is run Chapter 4 BEFORE you run Chapter 3. Start your players in Good Mead and they can fight the dragon in Good Mead, Easthaven, Termalaine, and either Bremen or Lonelywood. Doing it that way, you have an actual moral dilemma (do we save Bremen or Lonelywood?); the players have to make smart decisions under pressure (do they chase the dragon from Easthaven down to the Caer Konig dead end or get ahead of it at Termalaine; they feel like they've been effective at saving lives; and they've got a score to settle going into Sunblight.
I like this chapter, I think it's well put together, but giving the dragon a 15 hour head start is an insupportable choice, imo.
-
View User Profile
-
Send Message
Posted Oct 7, 2020That was my initial thought also.....run it in that order and let them try to stop it (or at least decrease the loss of life)....then, if it gets away, follow it back to the keep and confront it and its maker there......
They still have choices to make, and they can still save (and not save) lives, but at least they have a chance.
-
View User Profile
-
Send Message
Posted Oct 8, 2020I am just going to leave this here:
"To give you an idea of these dogs’ strength and endurance, records from Northwest Company fur traders in the 1800s note that a single pair of sled dogs could haul upwards of 1,000 pounds on a sledge (a sled like our modern day toboggan) over a short distance, and they routinely hauled loads of 300 or more pounds over 20 miles in under five hours. Modern-day sled dogs travel at an average of 20 mph over shorter distances, and 10 to 14 mph on longer distances. Even in poor trail conditions, sled dogs can manage 6 to 7 miles per hour. The dogs may travel over 90 miles in a 24 hour period while pulling up to 85 pounds apiece!"
https://dogtails.dogwatch.com/2012/01/16/sled-dogs-part1/#:~:text=Modern-day sled dogs travel,up to 85 pounds apiece!
And thats before we even get to the fantastic Tauntaun-like Axe-Beak which have no rules to support their ability to walk on the snow and potentially get the players closer to their standard travel speeds from the PHB. Unfortunately the travel rules for mounts and overland travel in Rime are half-baked at best and completely neglected at worst. I highly recommend figuring out what works best for your storytelling style before setting your players up to fail. Traveling across Icewind Dale should be exciting and scary all-in-one and RAW it is just disappointing. 15-minutes of real-world research could have made this a highlight of the campaign as PCs bond with their beasts of burdens and use a strategic advantage to outwit unprepared foes.
-
View User Profile
-
Send Message
Posted Oct 8, 2020I'm a little concerned that the front page of the main website my players go to get to their characters is flashing "HEY! HERE'S HOW YOUR DM CAN RUN THIS ENCOUNTER"
I understand the need to popularize and sell, but this is frustrating for those of us that want to run a purely spoiler-free game.
"Don't look at the front page of the DNDBeyond website". Of course the curious will look.