


So you’ve got the perfect magic item dreamed up, a +3 hammer of aggressive door opening. Or maybe you've jotted down a cursed ring of social awkwardness. You’ve decided exactly how you’re going to drop it into the campaign and know your players are going to love it! But now you need to actually make the item so that it can be added to a character sheet. Here's how to homebrew a magic item on D&D Beyond.
1. Access the homebrew magic item creation tool
There are three ways to access the homebrew magic items creator on D&D Beyond.
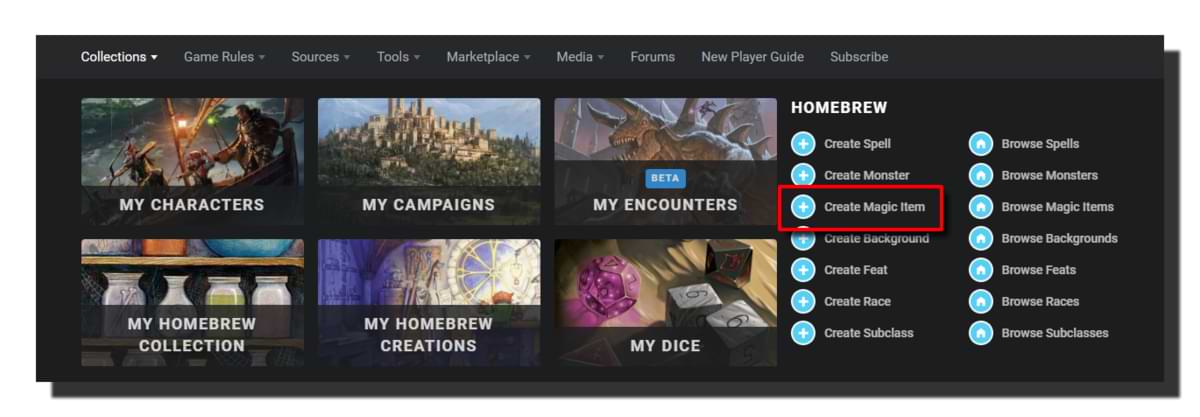
Through the main menu
Hover over "Collections" in the main menu bar and select "Create Magic Item."
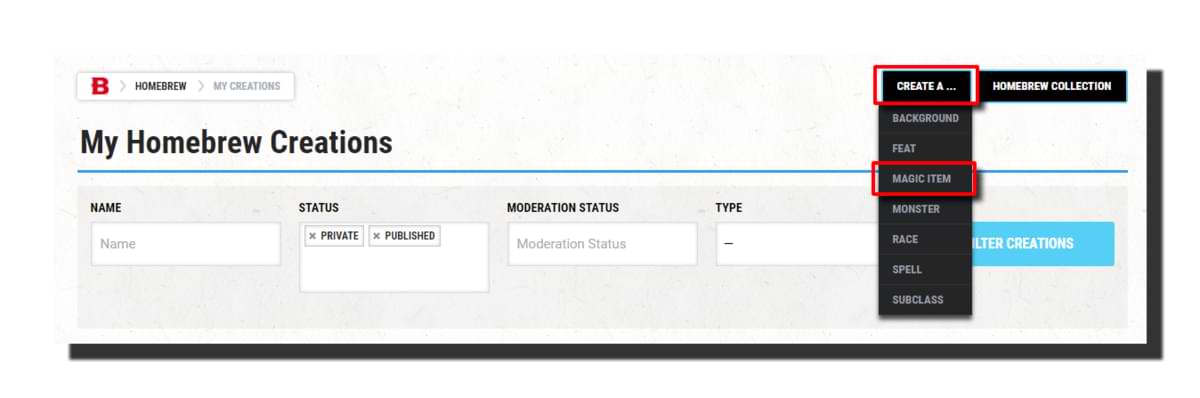
 From My Homebrew Creations
Go to "My Homebrew Creations" (accessible from "Collections" or by clicking here) and mouseover "Create a…" from the dropdown. Select "Magic Item."
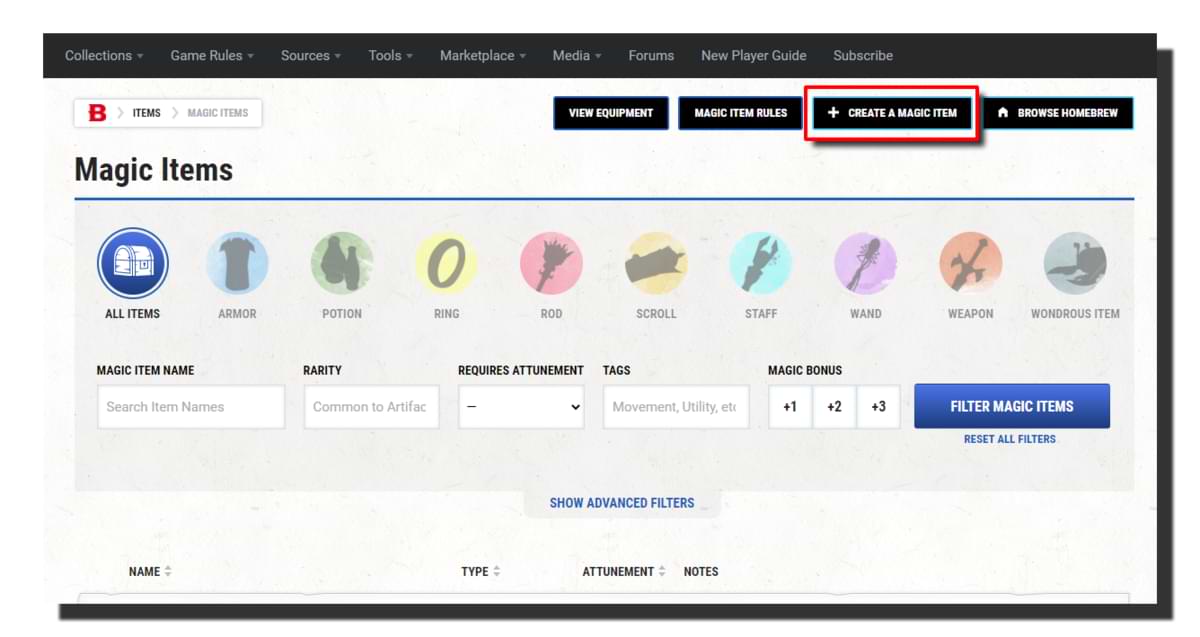
From the Magic Items page
Hover over "Game Rules" in the main menu and select "Magic Items" (or click here). From there, you can select "Create a Magic Item."
Following any of these steps will bring you to the Create Homebrew Item page, where you’ll have two options:
- Use an existing item as a template
- Create a magic item from scratch
We're going to use the second option to make my item the Huntress's Bow.
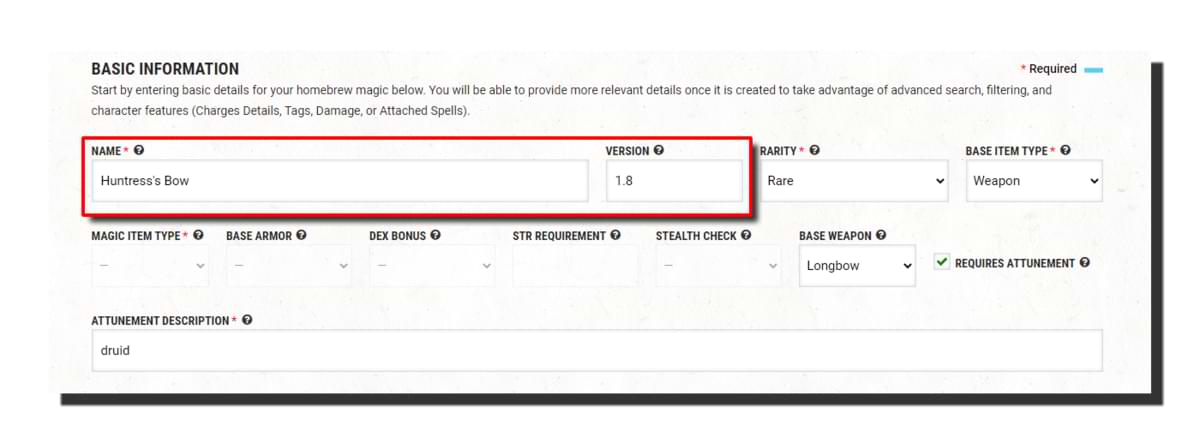
2. Fill in basic information
Item name and version
This is where you put in your awesome, cool name for your magic item. In this case, we're going with Huntress's Bow.
It’s always a good idea to come up with a version number for reference in the version field, especially if you have to make changes or improvements after publishing. This can help you track your changes and keep things organized.
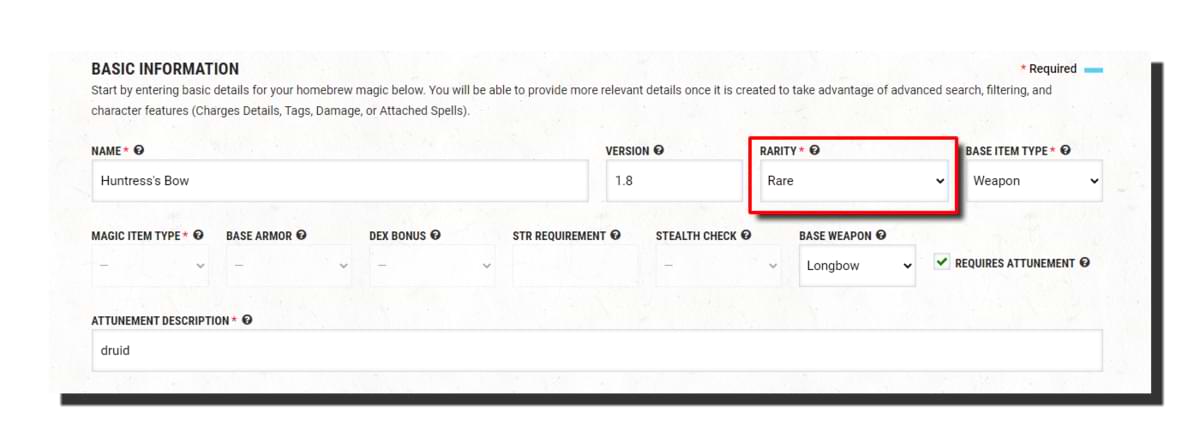
 Magic item rarity
Here, you can select the rarity of your item from the dropdown. Common, uncommon, rare, very rare, legendary, and artifact are your standard options, but there are also a few special rarities.
"Varies" can be used when your item has different versions that vary in rarity, such as with potions of healing. This is usually not needed with homebrew items, as you can make one version per rarity. There’s also "Unknown Rarity," which can be used when your item doesn’t have a rarity, as is the case for several of the official items that use it.
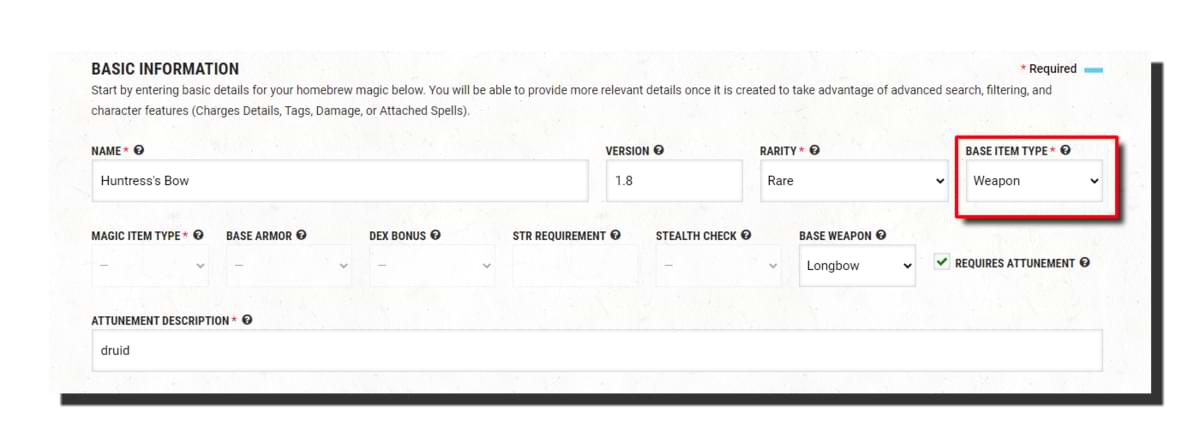
Base item type
You'll choose from three options: "Item," "Armor," and "Weapon." Depending on which type you pick, different options will be enabled in the next row. As we're making a magic weapon, we'll select Weapon.
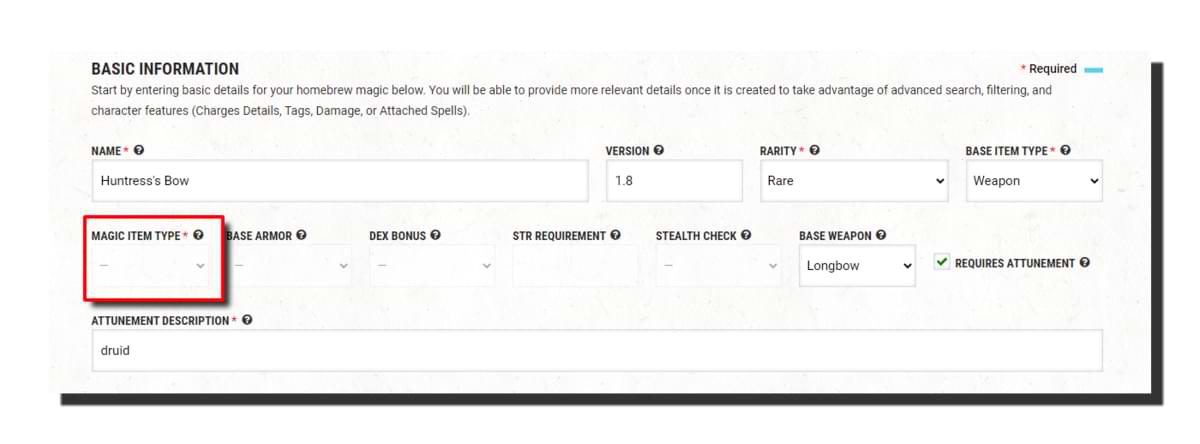
Magic item type
If you choose "Item" for the "Base Item Type," this field will be enabled. From this dropdown, you can select from the main magic item types in the game. As we're making a magic weapon, this field is disabled.
Basic armor properties
If you’ve set "Base Item Type" to "Armor," three dropdown menus and a text field will be enabled.
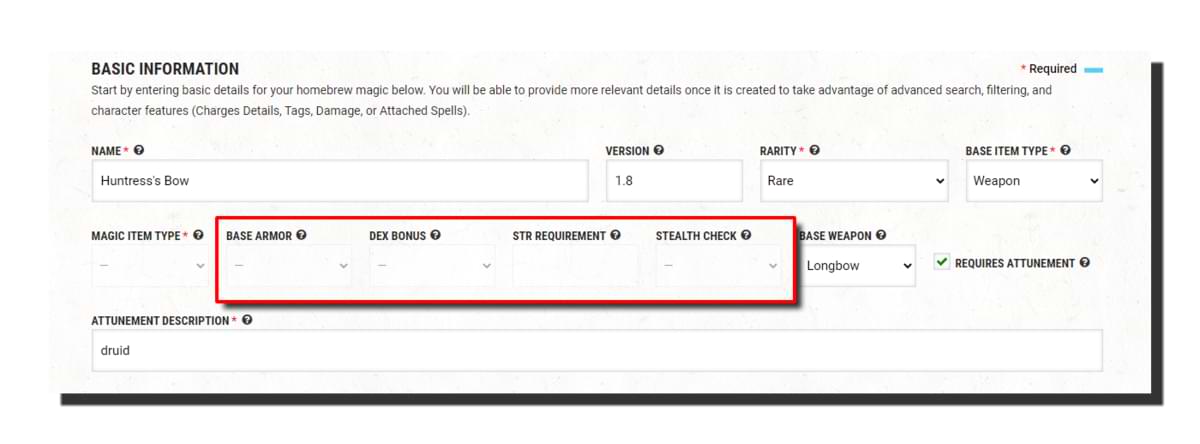
- Base Armor: Specify which type of armor your magic item is based on, such as hide or breastplate.
- Dex Bonus: Decide how much of the character's Dexterity bonus the armor uses. It could be the full modifier, up to +2, or none at all.
- Str Requirement: Set the minimum Strength score required to properly use the armor. You can set this to almost any value, so if you want to make that minimum Strength 30 armor of Heavy Metal, you can!
- Stealth Check: Specify what Stealth penalty the armor imposes. It can be no penalty or disadvantage.
Again, as we're making a weapon, these fields are disabled.
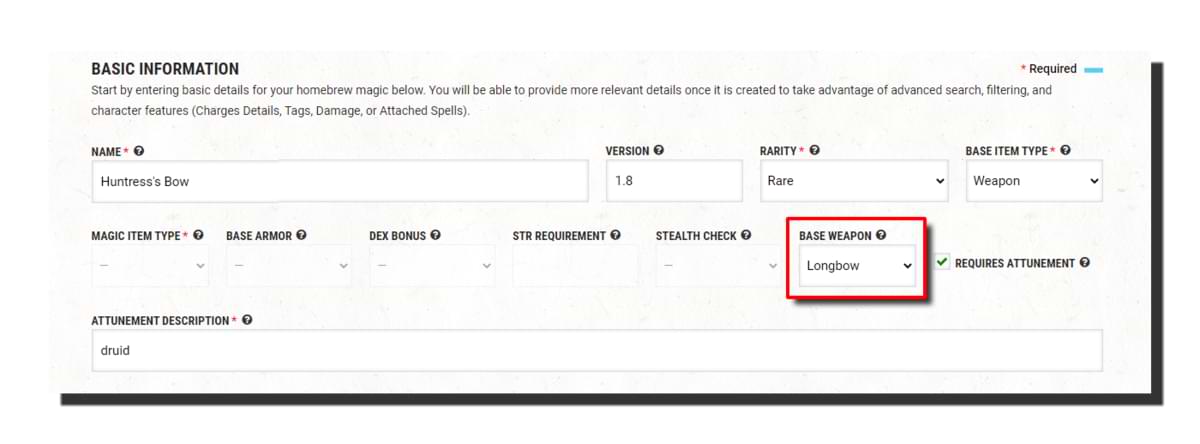
Base weapon
If you’ve set "Base Item Type" to "Weapon," as we have, this field will be enabled. From here, you can select from the many base weapons in the game, from pistols to whips! We're making a longbow, so we’ll select that option.
Attunement requirements
If your homebrew magic item requires attunement, you can check the "Requires Attunement" box. If the attunement has a specific requirement like a staff of the woodlands does, you can enter that information in the "Attunement Description" box.
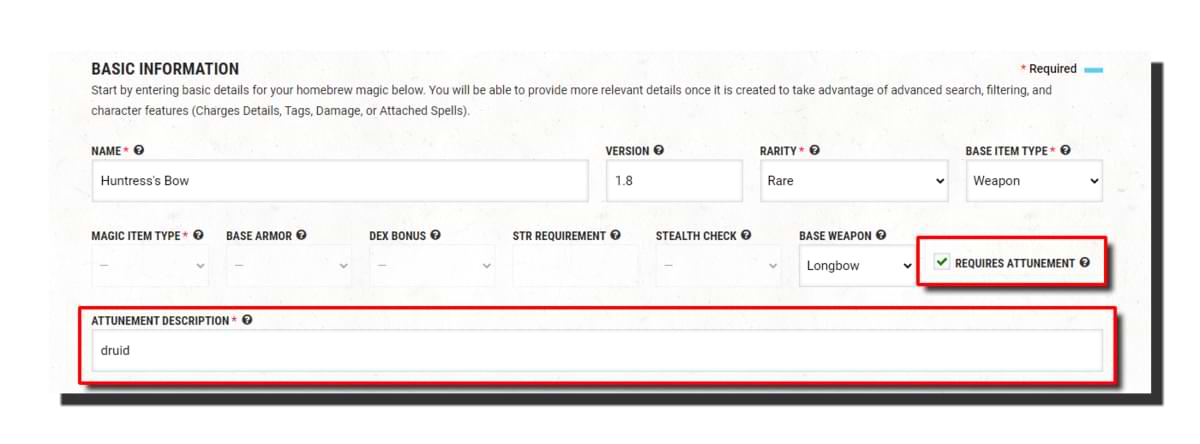
Note: The "Attunement Description" field automatically completes some of the text for you, so you don’t have to write out a whole description. Anything you put in this field will be preceded by “Requires attunement by a…” Because we want this item to say “Requires attunement by a druid," we only have to type “druid” in this field.
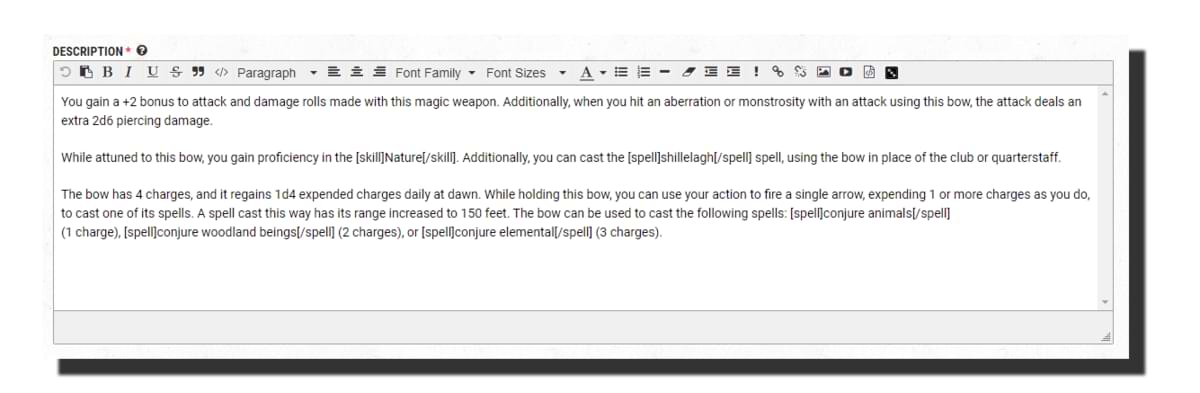
Item description
Here is where you describe your magic item in all its glory. It’s important to remember that what you put here should fully explain what your item is and how it works. All the various bonuses and modifiers should be clearly explained so that anyone reading it understands what the item does.
 You can use tooltips to help with this. While tooltips could make up an article on their own, here are some useful ones. To use them, simply remove the extra spacing:
- [ condition ]...[ /condition ] e.g. restrained
- [ sense ]...[ /sense ] e.g. darkvision
- [ skill ]...[ /skill ] e.g. Persuasion
- [ spell ]...[ /spell ] e.g. magic missile
- [ wprop ]...[ /wprop ] e.g. finesse
Save point!
Now that you’ve filled out all of the basic information for your homebrew creation, hit "Create Magic Item." This will save your progress and give you access to the fields and options where you can add various modifiers.
As a navigation tip, you’ll see something like this:
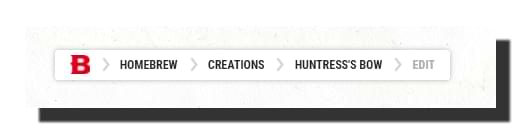 You can not only use this to get back to the main edit page if you’re adding a modifier but also view the magic item itself as it’ll appear when finished. This will reflect the last time you’ve saved, so save often!
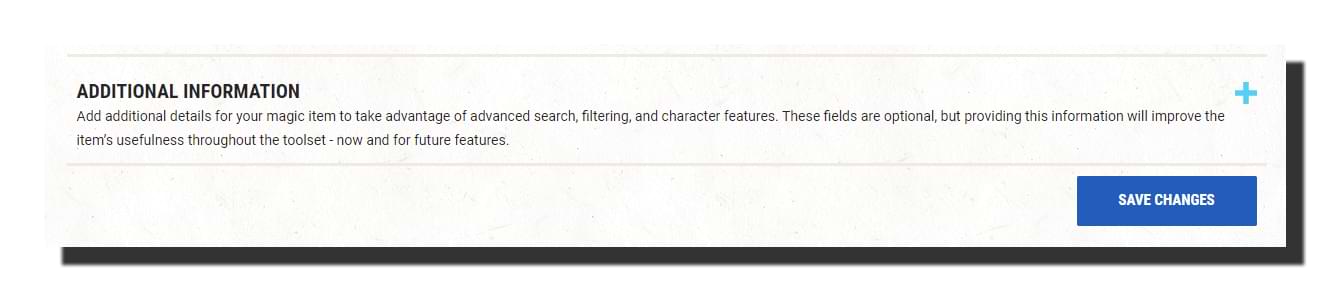
3. Add in additional information
Now that you’ve created your magic item, you’re ready to add additional information. None of this information is required, but some of it, such as charges, can be useful. If you click anywhere in the "Additional Information" section, the fields will expand.
Charges
A lot of items use charges as a way of providing limited-use features. You can specify which modifiers and features use charges later on, but first, you need to give your item some charges to use.
Selecting "Has Charges" will enable this feature and allow you to enter a value in the ‘Number of Charges" field. We're going to give this item 4 charges for now, although this might need tweaking following some playtesting. The next field is "Charge Reset Condition," where you specify under what circumstances the charges reset, such as after a short or long rest.
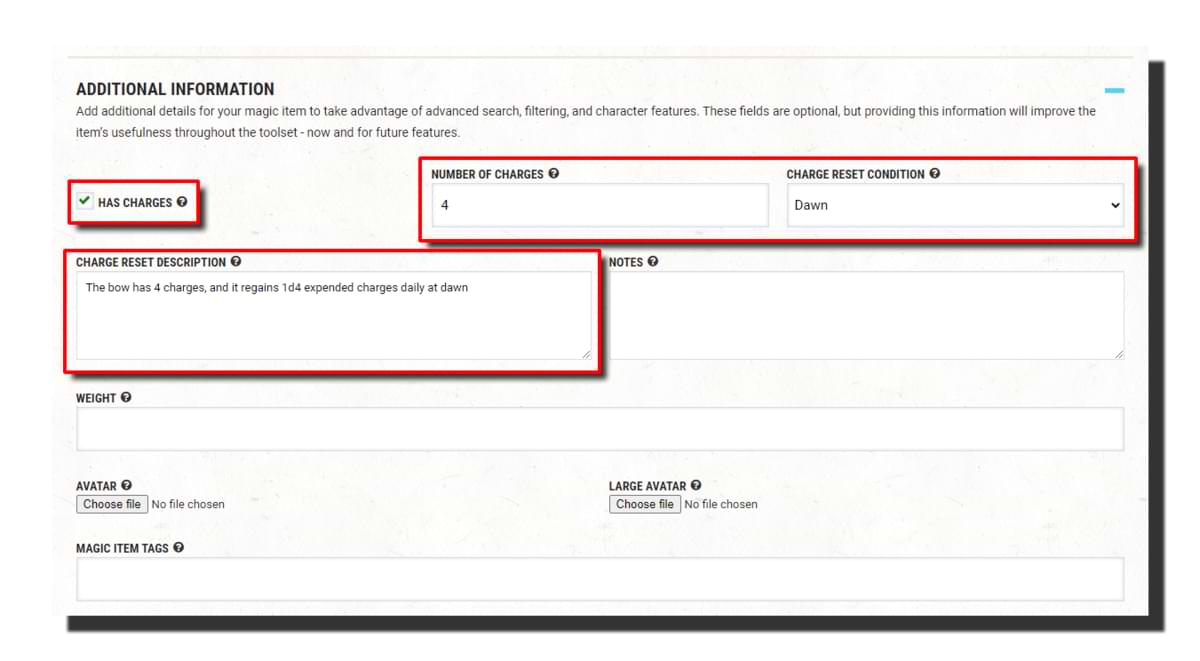
Finally, there’s "Charge Reset Description." This is where you can specify how many charges the item regains. For example, “The bow has 4 charges, and it regains 1d4 expended charges daily at dawn” or “The bow has 4 charges, and it regains 1 expended charge each time you reduce a creature to 0 hit points.”
Notes and item weight
If you want to specify a weight for your homebrew magic item, you can enter it here. You can also add notes on the item. These notes aren’t displayed anywhere and are more for personal reference.
Upload images
If you don’t plan on publishing your item, you can add custom artwork. You can upload a regular and large avatar if you wish, although it’s not essential. It should be noted that if you do publish an item with artwork, the artwork will not be visible to anyone but you.
Item tags
Finally, you can add any relevant magic item tags. These don’t do anything mechanically and are simply a way to categorise magic items. For example, I added the "damage" and "summoning" tags.
4. Set modifiers, conditions, and spells
With the "Additional Information" section covered, we can now move on to the "Modifiers," "Conditions," and "Spells" fields. Modifiers make up the majority of how your magic item will work, and there are a lot of options. For our Huntress's Bow, we're going to add four specific modifiers:
- +2 bonus to attack and damage rolls made with this weapon
- An additional 2d6 damage against aberrations and monstrosities
- +1 bonus to the character's Wisdom score
- A skill proficiency
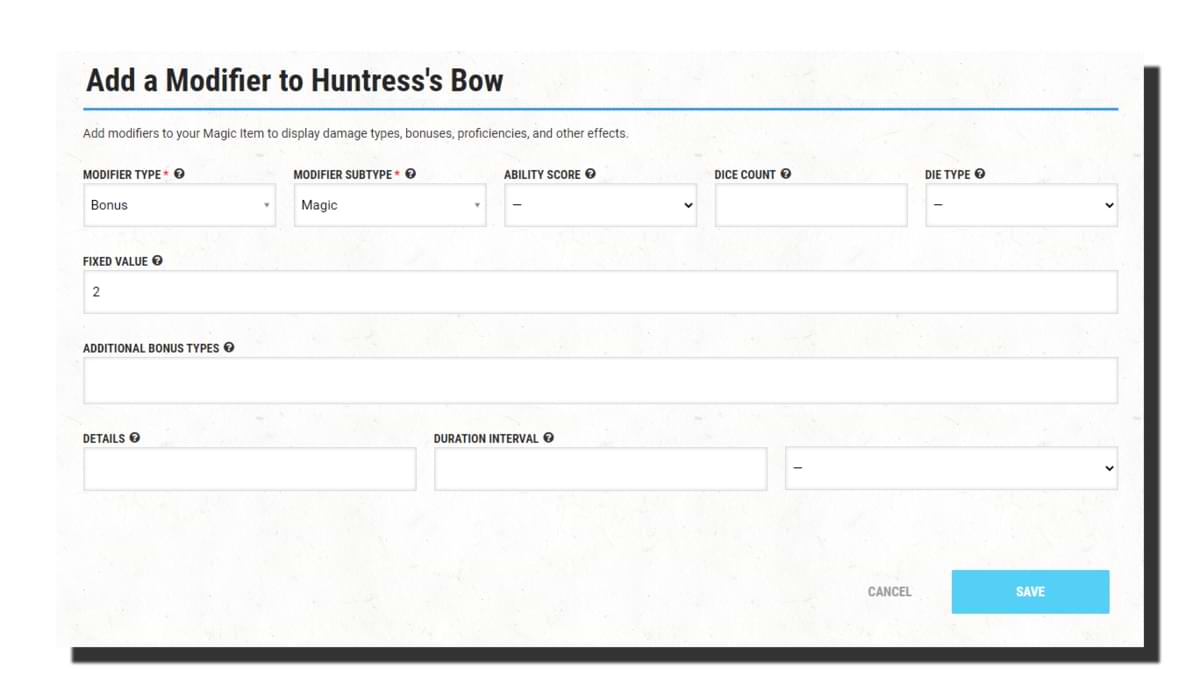
To hit and damage bonus
First, we want to add the +2 to attack rolls and damage rolls. Luckily for us, these can be added as a single modifier:
- "Modifier Type:" Bonus
- "Modifier Subtype:" Magic
- "Fixed Value:" 2
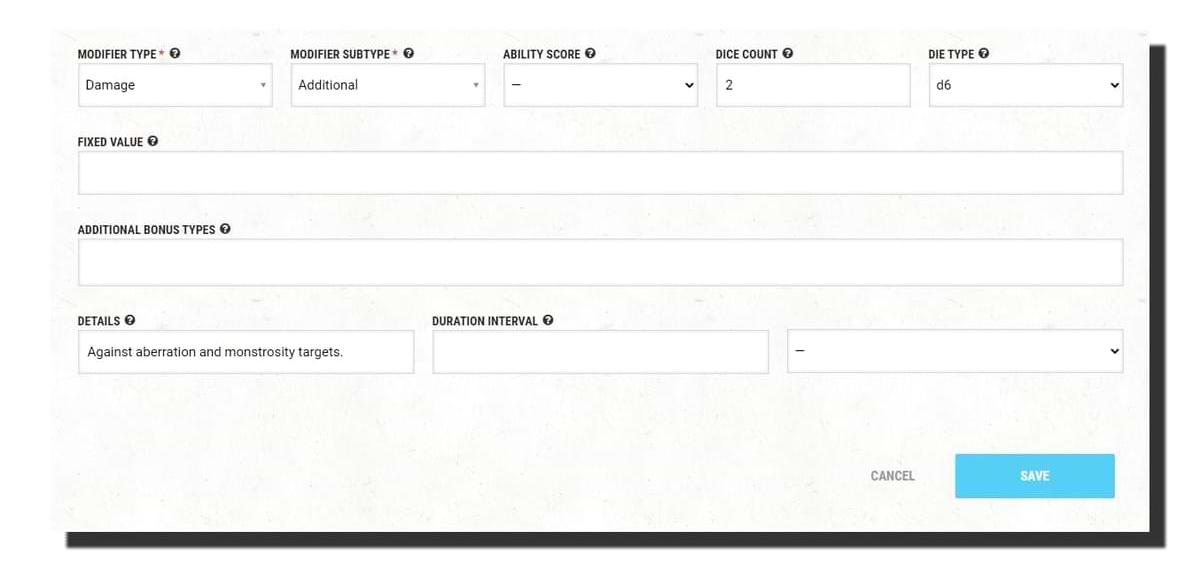
Additional damage
Next, we want to add the additional 2d6 damage to aberrations and monstrosities.
- "Modifier Type:" Damage
- "Modifier Subtype:" Additional
- "Dice Count:" 2
- "Die Type:" d6
Ability score bonus
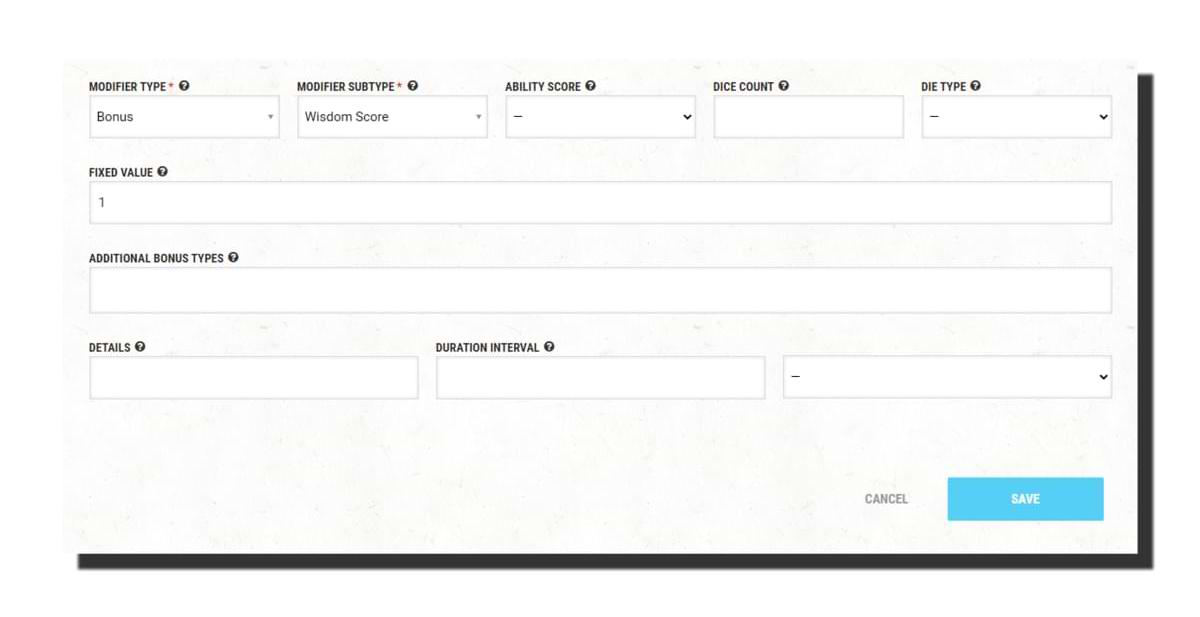
To add the item's Wisdom bonus, click "Add a Modifier" and then make the following selections:
- "Modifier Type:" Bonus
- "Modifier Subtype:" Wisdom Score
- "Fixed Value:" 1
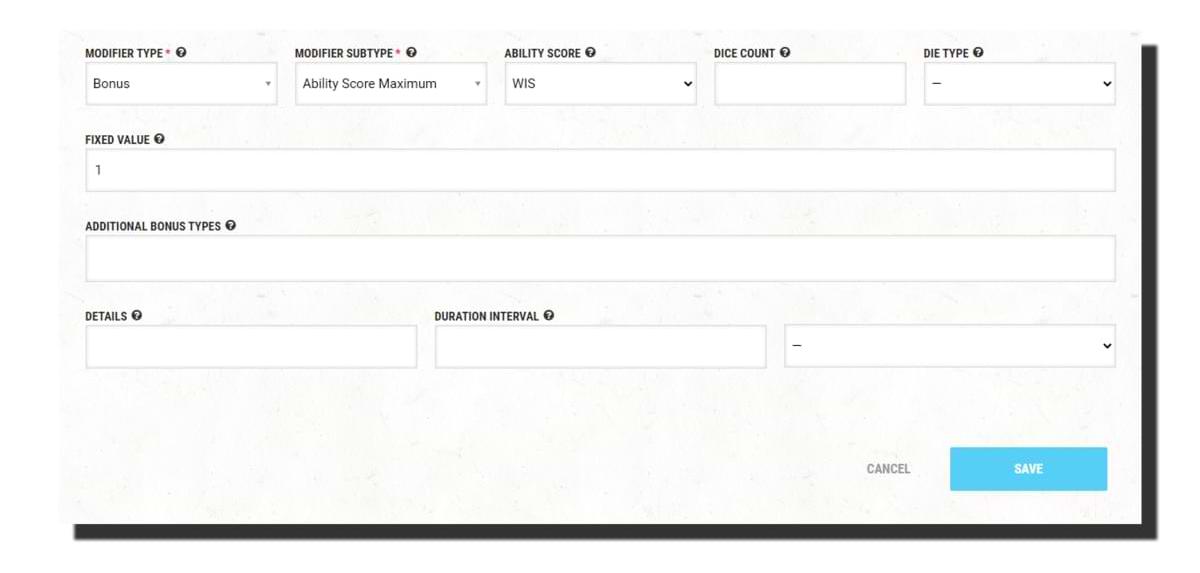
 Now, if you wanted this bonus to allow your ability score to go above 20, you would also need to increase the ability score maximum. To do this, add a second modifier with the following properties:
- "Modifier Type:" Bonus
- "Modifier Subtype:" Ability Score Maximum
- "Ability Score:" WIS
- "Fixed Value:" 1
My item is only going to increase the character's Wisdom score — not their maximum — so I won’t be adding that modifier.
Skill proficiency
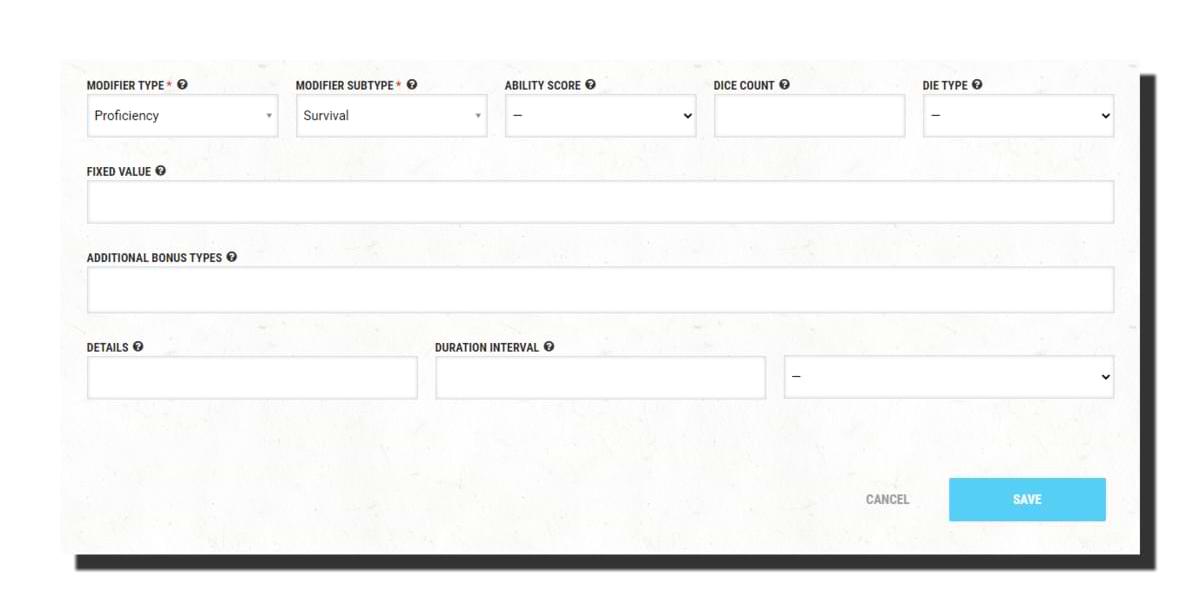
Finally, I want to add proficiency in the Survival skill. Add a new modifier and select the following options:
- "Modifier Type:" Proficiency
- "Modifier Subtype:" Survival
Conditions
If your item inflicts any conditions or suppresses them, you can add them here. This will then cause the condition to be displayed in the item's "Notes" section, although it won’t cause the condition to be applied to the character sheet. My item doesn’t interact with conditions, so we're leaving this section blank.
Spells
If you want your item to include spells that the character using it can cast, you’ll add them here. Spells can be added in one of two ways, to be cast at-will or to be cast using charges. You can also specify if the spell is cast at a level other than its lowest and if it can be upcast using charges.
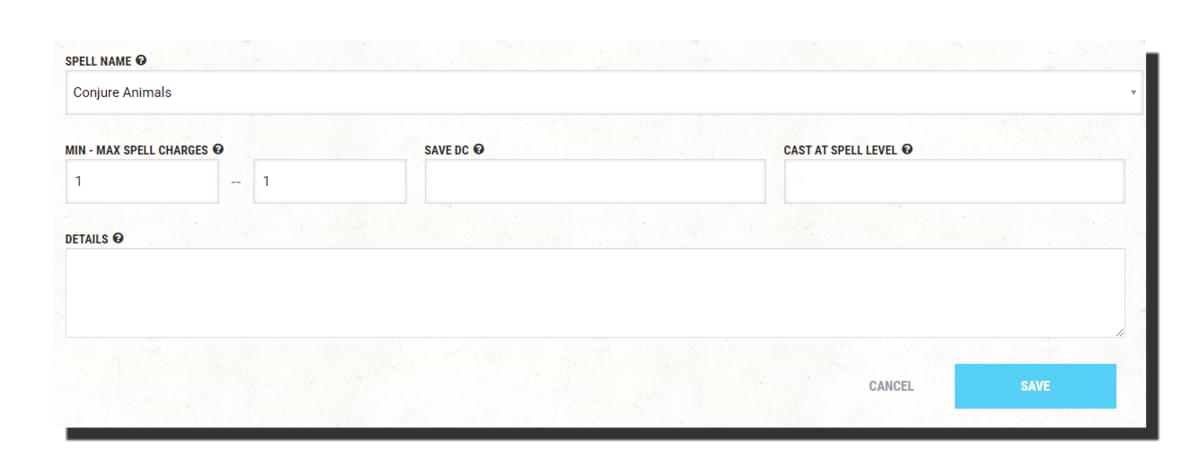
In order to add a spell that is cast at-will, click "Add a Spell." Under "Spell Name," select the spell you want to add, and then click "Save." The spell will be added to the item and will appear on the character sheet as castable at-will. If you want to set the spell to be cast at any level other than its lowest, you will want to enter that level in the "Cast at Spell Level" field. We're going to use this option to add an at-will casting of shillelagh.
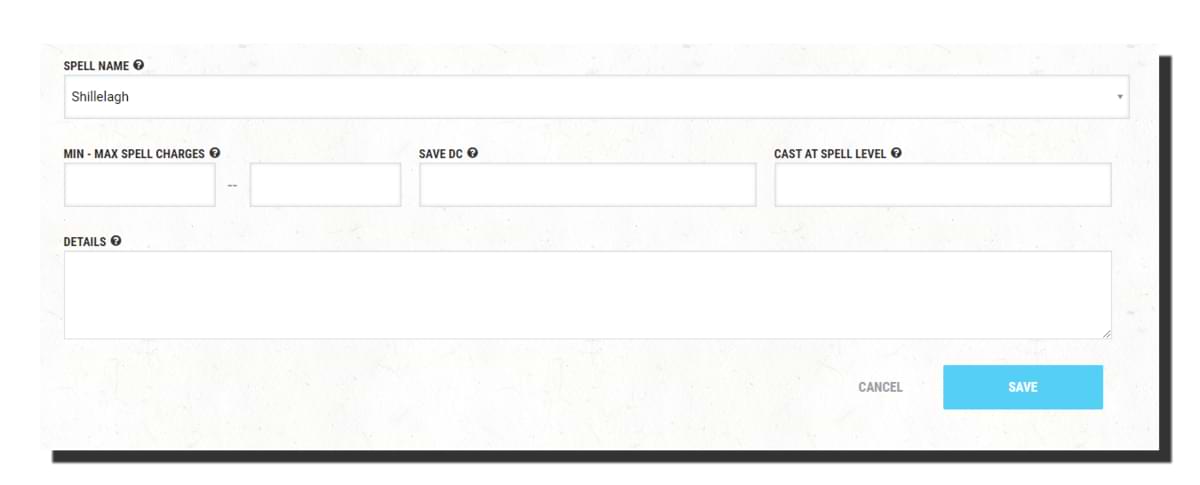
To add a spell that uses charges, you will want to do pretty much the same as above, but fill out the "Min - Max Spell Charges" fields. The minimum field sets the number of charges required to cast the spell at its lowest level. If you want the spell to be only castable at that level, you set the maximum field to the same number.
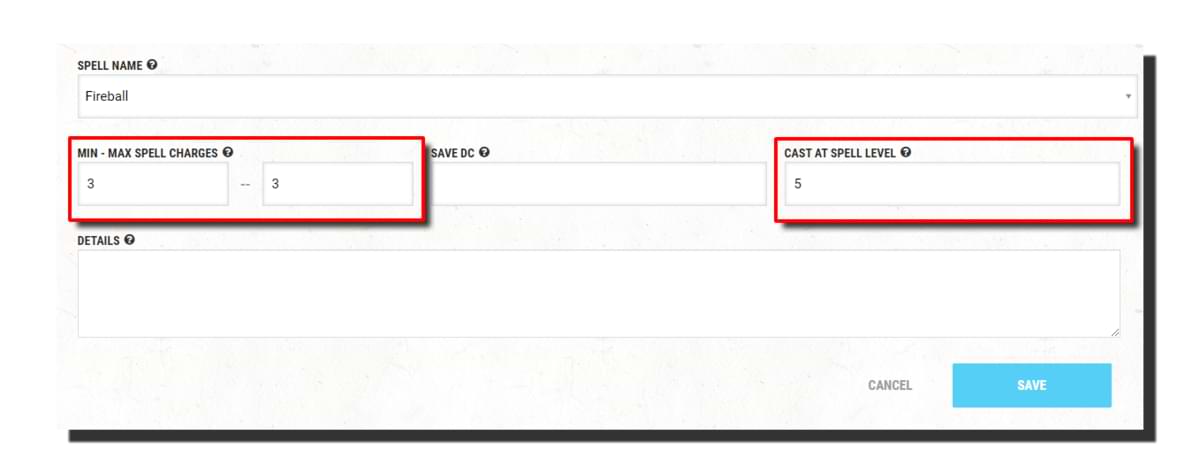
If you would like to increase the level the spell is cast at above its lowest, you can specify that in the "Cast at Spell Level" field. For example, to have fireball cost 3 charges to be cast at 5th level, you’ll want to set both "Min and Max Charges" fields to 3 and the "Cast at Spell Level" field to 5.
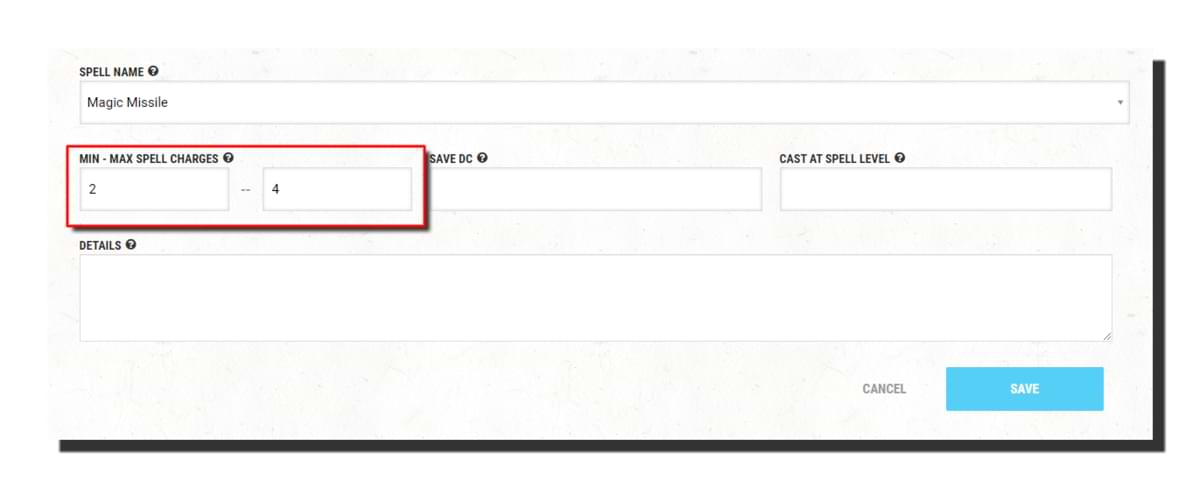
If you want to make it so the spell can be upcast using charges, you’ll want to set the maximum charges to be higher than the minimum. Each charge increases the spell's level by 1, so if you set the minimum charges to 2 and maximum charges to 4, you’ll be able to cast the spell at its lowest level for 2 charges, one level higher for 3 charges, and two levels higher for 4 charges.
Finally, you can use the "Save DC" field to specify the saving throw DC of the spell, in case it differs from how it would normally be calculated.
Once you’ve set up your spells, you’re all done!
4. Put the finishing touches
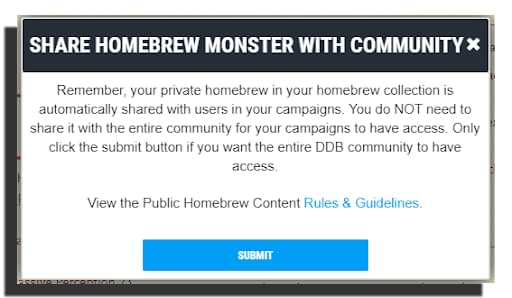
You now have a finished homebrew magic item! Hit save one more time for good measure and then bask in the glory of your creation. Assuming your creation follows the Homebrew Rules & Guidelines, you can publish it for the community to enjoy by clicking "Share With Community." This is optional, however! There's no need to select "Share With Community" if you just want the magic item to be used in your campaigns.
If you plan to publish your magic item to the D&D Beyond community, make sure you’ve done the following:
- Proofread your work, because once it’s published, you can’t edit it.
- Playtested it to ensure all of the modifiers work.
- Checked the homebrew against the Homebrew Rules & Guidelines to ensure it doesn’t violate any of the rules.
If you’ve done all that and you’re positive your homebrew is suitable to be published, click that "Submit" button. I’ve done just that with the magic item I’ve made in this article, and you can find it here.
Update: Well it looks like I made a small error with the damage typing for one of the modifiers, but luckily it seems the community has a higher perception than me and pointed it out. Additionally, I got some amazing feedback on how to make the weapon better, so what better opportunity to explain how to update published homebrew!
Mike Bernier (@arcane_eye) is the founder of Arcane Eye, a site focused on providing useful tips and tricks to all those involved in the world of D&D. Outside of writing for Arcane Eye, Mike spends most of his time playing games, hiking with his girlfriend, and tending the veritable jungle of houseplants that have invaded his house.
-
View User Profile
-
Send Message
Posted Nov 6, 2021cool
-
View User Profile
-
Send Message
Posted Nov 6, 2021This is fantastic to have. I am happy lad.
-
View User Profile
-
Send Message
Posted Nov 6, 2021So, what if I don't want to use a weapon template? If I want to create a unique weapon with different dice?
-
View User Profile
-
Send Message
Posted Nov 6, 2021A minor nitpick in the wording, but it doesn't specify how often you can cast shillelagh. A better wording would be: "Additionally, you can cast the shillelagh spell from the bow at will, requiring no components, and when you do so you can target the Huntress's Bow instead of a club or quarterstaff.
Best way to do that is either to make it an item and add new actions to it or make a custom item and attack on the character sheet.
-
View User Profile
-
Send Message
Posted Nov 6, 2021The only issue here is that "Additional" is not an option in the modifier sub-type when 'Damage' is selected as the modifier.
So far, all I've been able to do is select "Damage' and then the type of damage (be it slashing, fire, radiant, etc.) and then enter the amount of dice damage. This seems to work pretty well on D&DBeyond.
-
View User Profile
-
Send Message
Posted Nov 6, 2021DDB Feedback: I think the images you can add to a homebrew should be visible to everyone.
-
View User Profile
-
Send Message
Posted Nov 7, 2021Good point, although because shillelagh is a cantrip, it's in theory already castable at-will. I'm probably going to release a version 2 of this item at some point with the great feedback I've been getting.
The automoderator bot that checks homebrew for copyrighted or inappropriate content works okay for text (and still requires human eyes to catch a lot of stuff), but it would not at all work for images. The only way to ensure homebrew isn't being uploaded with either someone else's art, or inappropriate images, would be to go back to the dark times of every piece of homebrew being manually approved by a human.
-
View User Profile
-
Send Message
Posted Nov 7, 2021You're right, reviewing the steps this should be piercing damage rather than additional. I'll look into getting the steps updated, good spot!
-
View User Profile
-
Send Message
Posted Nov 7, 2021It is not currently possible to add Actions to magic items. DDB has not yet added the Actions subform to the Magic Item form in the content creation platform.
alas my mother would say, “it’s good to ‘want,’ it builds character.” Unfortunately, that’s all it’ll build around here in this case because DDB has not yet granted the ability to make basic equipment to those of use with lowly “user” privileges.
I know, right. It’s an available subtype for that modifier for other content, but since WotC hasn’t made an official magic item that does “additional” damage yet, they likely won’t add that subtype to the dropdown on the Modifiers subform attached to magic items. (Well, more accurately they won’t “unhide” it there.)
-
View User Profile
-
Send Message
Posted Nov 7, 2021Trying to learn how to do all of this, and this is an excellent post. Does anybody know how to make the number of charges equal the user's proficiency modifier?
-
View User Profile
-
Send Message
Posted Nov 7, 2021Excellent timing for me on the article Davyd!
I've been using Mike 'Sly Fourish' Shea's style of lazy magic items for a while now, wherein a +1 armor/weapon has a once-per-day spell attached to it, and I've using DDB to print handouts for my players that need them, as well as entering the ones he has in his books for similar reasons as "custom" items here on DDB.
(Don't worry, I'm not going to publicly publish them here on DDB, I want people to buy his stuff and give him the credit/money he deserves).
Your article pretty much says I've been entering data "wrong", and should be using charges. No sweat, that's a tedious but ultimately easy fix. But in the case of a magic items that have multiple spells tacked onto them, all of which are once-per-day use, how do I enter that into the magic item builder? Thanks in advance!
-
View User Profile
-
Send Message
Posted Nov 7, 2021That is not possible on DDB. Magic items are designed by WotC to be static, set at creation and thereafter immutable. Since WotC has never made a magic item with a number of charges based on any statement drawn from its user, DDB will not have made that possible.
That is also not currently possible.
-
View User Profile
-
Send Message
Posted Nov 8, 2021Feels like rangers should also use it... hunting monsters with bows is their whole thing.
-
View User Profile
-
Send Message
Posted Nov 8, 2021My thought for this was more about summoning beasts than hunting them, but that being said, that's also kinda rangers vibe. I'm hoping to do a revised version of this bow with some of the great feedback I've been getting implemented. Watch this space!
-
View User Profile
-
Send Message
Posted Nov 8, 2021For this I usually choose a different weapon type with the damage dice for the weapon i want to make, and just rename it something else. This is pretty flexible, and using tweaks on the character sheet itself you can get around proficiency issues and such.
-
View User Profile
-
Send Message
Posted Nov 8, 2021This is a really cool article! I would definitely love to see one of these for all of the homebrew features: Monsters, Subclasses, and so on! There's a lot of stuff I've had to pick up as I've designed things for my own use, and I'm sure there's even more I don't know how to do! Good work!
-
View User Profile
-
Send Message
Posted Nov 8, 2021For those looking to use the DDB tooltips as well as link item DCs to the characters here are some links I found handy.
DDB tooltips overlay: https://dndbeyond.zendesk.com/hc/en-us/articles/360002038813-How-to-add-tooltips-to-your-creation
Making numbers in the items/feat/etc use the character's stats: https://www.dndbeyond.com/forums/dungeons-dragons-discussion/homebrew-house-rules/25930-using-snippet-codes-in-your-homebrew
-
View User Profile
-
Send Message
Posted Nov 8, 2021Awesome article, I've never done a homebrew item. Now I really want to!
-
View User Profile
-
Send Message
Posted Nov 9, 2021That's awesome to hear! I'm glad to have helped inspired someone!
-
View User Profile
-
Send Message
Posted Nov 9, 2021An option to create non-magical more utility / random items would be awesome as well.
Sometime i simoke want to create a Vial of something something, without actually making it a "magic item"