


This week’s encounter is Death from Above, a standalone one-shot that you can drop into any D&D campaign while the characters are traveling across a vast, open landscape. From the arid steppe to rainy plains to a lush mountain valley, this encounter can be placed anywhere with a wide open sky. Best of all, you can scale Death from Above to any tier of D&D play because of its simple premise: while traveling, the party is attacked by flying monsters!
This encounter pairs perfectly with D&D adventures that send your heroes on epic, realm-spanning quests like Tyranny of Dragons, Storm King’s Thunder, and Tomb of Annihilation. You can also drop this encounter into your homebrew campaign to stall your players when they decide to do something totally unexpected, like traveling halfway across the continent on a whim or even just going to a town that you hadn’t prepared yet.
Scaling this Encounter
This encounter can be scaled to suit characters of any level. Each version of this encounter is suitable for each of the four tiers of D&D play—optimized for play at 2nd, 5th, 11th, and 17th level. This is just the beginning, though. You can use the D&D Beyond Encounter Builder to further tailor this encounter to suit your party’s size and strength. If you’re playing with parties that are at the strong end of their tier, err on the side of increasing the numbers of the creatures in that tier, rather than pitting them against a higher-tier encounter.
For example, if you have a party of four 4th-level characters, you’re more likely to have a balanced fight if you increase the number of enemies in the tier 1 encounter. It might make more sense to reduce the number of monsters in a tier 2 encounter, but it’s easier to add power to a weaker encounter than remove power from a stronger one.
Why is tier 1 optimized for 2nd level, and not the lowest level of the tier (that is, 1st level) like the other tiers? Level 1 is a great starting point for new D&D players, but raising the base level of these encounters to 2nd level creates more opportunity to incorporate a diverse array of monsters and traps, rather than relying on the usual suspects for 1st-level adventures.
Combat Encounter: Death from Above
This encounter is suitable for characters of any level, if you follow the scaling guidelines.
The characters are traveling across a wide-open landscape when a deadly creatures attacks from the skies. These adventurers may be traveling on foot or on horseback, alone or as part of a larger caravan. No matter the circumstances of their expedition, this attack appears out of the blue, and the monsters use hit-and-run tactics to stay well out of reach of the party.
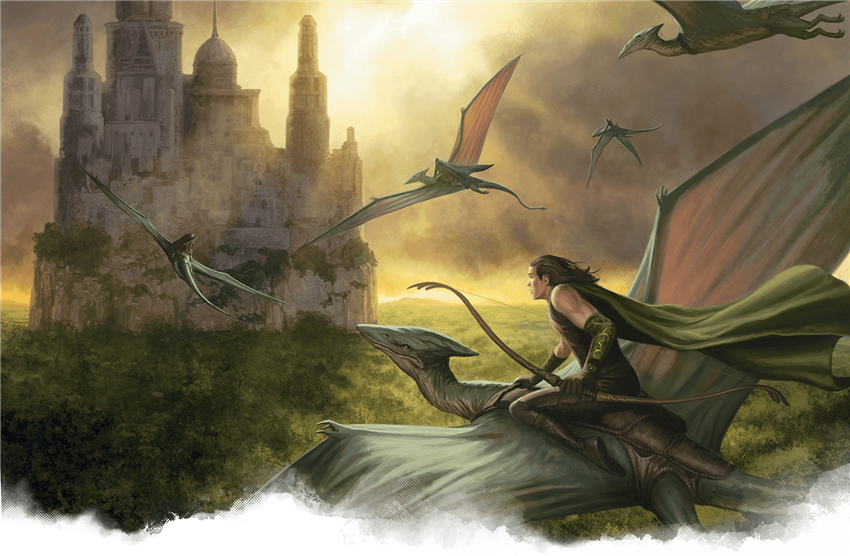
Tier 1 Encounter: Pteranodon Predators
Read or paraphrase the following:
You’re traveling across a vast, open landscape. The sun beats down upon you relentlessly, and the song of countless cicadas fills the air. Suddenly, all sounds of insects are silenced as a bestial shriek cuts across the plains. Several flying silhouettes streak through the air, headed directly at you!
A group of three halfling scouts fly directly toward the characters, each mounted upon pteranodons. This encounter begins when the pteranodons and their riders are 150 feet away. If any of the characters have a passive Wisdom (Perception) score of 14 or higher, the characters hear the pteranodons early, and the encounter starts as the sky raiders are 300 feet away.
Tactics. The bandits urge their mounts to take the Dash action (allowing them to fly 120 feet in a single turn) until they begin their turns less than 60 feet away from the characters. Then, they swoop in, giving the scouts a chance to attack with their shortswords. Then, the pteranodons fly away, using their Flyby trait to prevent the characters from making opportunity attacks. These scouts don’t fight using their longbows while mounted, since they haven’t had the chance to train their mounted marksmanship skills.
The pteranodons serve as mounts for their riders. Once a pteranodons rider dies, however, starts fighting the characters of its own accord. Once all of the halflings are dead, the surviving pteranodons flee as quickly as possible.
This tier 1 encounter fits perfectly in the world of Eberron: Rising from the Last War, where halflings who hail from the Talenta Plains often ride dinosaurs into battle. Talenta halfling bandits who fly on the backs of pteranodons are rightly feared by airship captains, who have few defenses against these lightning-fast sky pirates. You could even set this encounter on the deck of an airship as it falls under attack by these raiders!
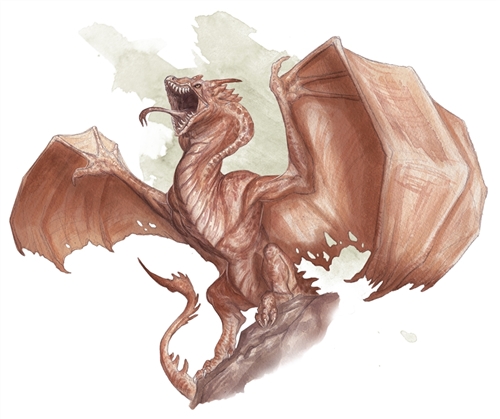
Tier 2 Encounter: Wyvernback Wizard
 Read or paraphrase the following:
You’re traveling across a vast plain. The field is completely flat save for a few tall rocky outcroppings that jut out of the ground every few thousand feet. The wind whips all around you, grabbing at hem of your clothing and the straps on your packs. The wind also kicks huge clouds of dust into the air, creating a thin brown haze on the horizon. Then, amidst the haze, you see it: a silhouette, growing closer with every passing second. A bloodcurdling wail cuts across the plains—something deadly in on its way.
The creature approaching the characters is a wyvern ridden by a mage. The wizard is a reclusive, territorial curmudgeon who wants to keep intruders away. The mage has already cast mage armor, raising his AC to 15. This encounter begins when the wyvern and its rider are 60 feet off the ground and 300 feet away, and the mage uses his wyvern to keep away from his foes as much as possible.
Offensive Tactics. The mage casts ice storm from its maximum range of 300 feet until he has expended all his 4th-level spell slots, or until the party gets within 150 feet. Then, the mage casts fireball, bombarding them from above and then commanding his wyvern to maneuver them as far away from the party as possible. The mage does this until all of its 3rd-level spell slots are expended, and then flees if the party hasn’t been defeated.
If the party tries to parley or surrender, the wizard shouts, “Then leave, or I’ll huck you another fireball!”
Defensive Tactics. If the mage is attacked, he uses his reaction to cast shield, using 1st- and 2nd-level spell slots to survive. Likewise, he uses counterspell to defend himself, using any 3rd-, 4th, or even 5th-level spell slots he has available.
Instead of a Wyvern. Alternatively, this encounter could take place on a snowy field, rather than a grassy or dusty plain. In this alternate encounter, the mage rides a young white dragon.
Tier 3 Encounter: Roc ‘n Rollers
Read or paraphrase the following:
You’re traveling through a rocky landscape. Tall, craggy cliffs jut out of the ground at odd angles every few hundred feet, and the grassy plains are covered with bits of scree and gravel. A shadow rises from atop one of these pillars, and leaps into the air with a cacophonous shriek. A massive bird soars above you, hiding the sun behind its massive form.
This roc is an eagle-like beast with a wingspan the size of a commercial airplane. Characters with a passive Wisdom (Perception) score of 15 or higher notice that the roc has boulders clutched in its talons. Little do they know that one of the boulders is actually a living elemental known as a galeb duhr. This encounter begins when the roc is 150 feet away and 60 feet in the air.
Roc Tactics. The roc begins this fight by flying 120 feet towards the characters, and then uses its action to hurl the galeb duhr and the other five boulders in its talons towards the characters. Characters in a 30-foot radius must make a successful DC 16 Dexterity saving throw or be hit by a falling boulder, taking 21 (6d6) bludgeoning damage. Since there are only five boulders (plus one galeb duhr), no more than six creatures can take damage from falling boulders. In this case, the creature with the highest failed Dexterity save avoids damage.
On subsequent turns, the roc swoops down to attack and grapple one character that stands alone, and then flies away. It ends the grapple when they are at least 60 feet in the air (no action required). The character begins to fall at the start of their next turn. The roc flees to its nest high in the mountains if it’s reduced to half its maximum hit points.
Galeb Duhr Tactics. The galeb duhr, which still appears to be a motionless boulder, also takes 21 (6d6) bludgeoning damage from the fall, and lands in a space about 20 feet away from the characters. It begins combat by using its Animate Boulders trait on two of the nearby boulders, which act on its initiative starting next turn. This action doesn’t break its False Appearance disguise. Then, on combat appearing as though they are inanimate boulders. On the second turn of combat, the galeb duhr roars a battle cry in Terran, then it and its animated boulders all roll towards the characters and use their Rolling Charge feature to deal extra damage.
Galeb duhr are protectors of the stone, and believe that the characters are trespassers. If the characters try to parley, it ceases its attack and tries to communicate. It also curls up, yells “I surrender!” in Teran, and rolls away to pretend to be a lifeless boulder if reduced to half one-quarter of its hit point maximum.
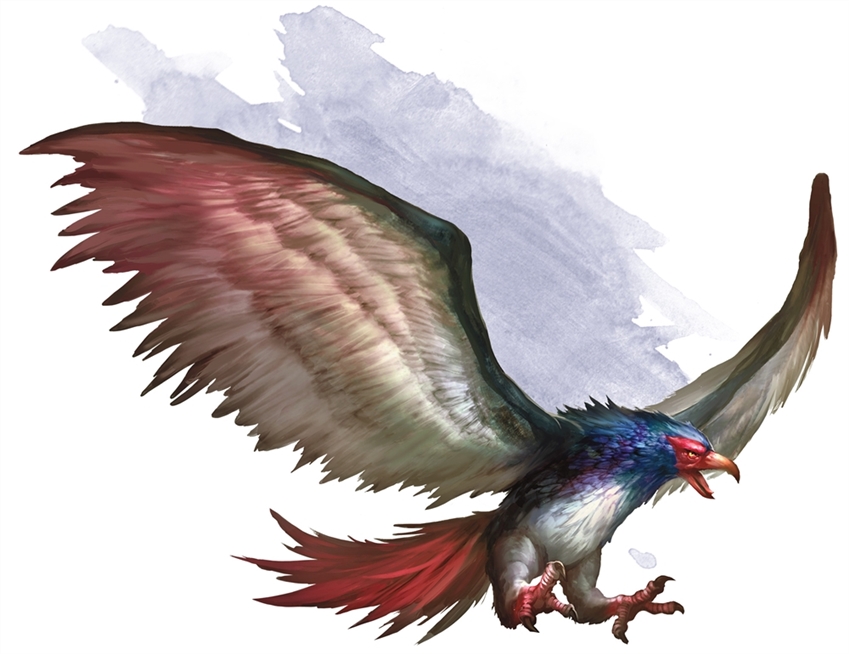
Tier 4 Encounter: Sphinx’s Sorrow
 Read or paraphrase the following:
While traveling through an arid, scrub-covered canyon, you see a lion dead in the road some two hundred feet ahead.
If the characters continue on this path, read:
As you get closer, you see that the creature isn’t a lion, for it has a pair of large feathery wings and a feminine, humanoid face. This once-beautiful creature is caked with blood and still covered with beautiful jewelry.
If the characters linger here for longer than a few seconds, characters with a passive Wisdom (Perception) score of 20 or higher notice a shadow pass over them for an instant. Following the shadow, they see a large sphinx perched atop the canyon about 120 feet away. Whether they notice or not, read:
“Murderers!” roars an immense voice. A winged, lion-like beast with a masculine face stands atop a rock in the distance. “You stand there, bloody-handed by her corpse. Even now, thoughts of plunder fill your minds! I will not permit you to touch a single hair of her mane!” As he speaks, a swarm of flying creatures bursts from the soil around him and soar in your direction.
This androsphinx is inconsolable with grief at the death of its partner, the dead gynosphinx that the characters found in the road. It attacks with malicious glee, and refuses to listen to reason. The eight small dragons that surround the sphinx are homunculi of mud and clay that the sphinx breathed life into with its divine magic. They use gold dragon wyrmling statistics, but are immune to poison and psychic damage, exhaustion, and the frightened and poisoned conditions.
This encounter begins when the androsphinx and its dragon creations are 120 feet away.
Androsphinx Tactics. The sphinx starts combat by using its First Roar as its eight wyrmling minions fly towards the characters. It uses dispel magic from as far away as possible to remove any buff spells the characters cast on themselves. If the characters start to advance towards it, it uses its Second Roar. It targets characters paralyzed by its Second Roar with flame strike. The sphinx only uses its Third Roar once its wyrmlings are destroyed, or once the characters have engaged the sphinx in melee combat.
If the sphinx is caught in a spell’s ongoing area of effect or is engaged in melee combat, it uses its Teleport legendary action to escape to a more advantageous position.
Wyrmling Tactics. The wyrmlings fly towards the characters and take the Dodge action until they’re in melee range. Then, half of them use their Weakening Breath and the other half use their Fire Breath on as many of the characters as possible. After that, they use melee attacks while their breath weapons recharge, using their flight to stay out of range of attacks if possible. They exist only to serve the sphinx, and have no concern for their own well-being.
Calming the Sphinx. The sphinx only stops its attack if it is calmed by someone who assures it that they were not responsible for the death of its mate and makes a successful DC 30 Charisma (Persuasion) check. The sphinx then uses its zone of truth to ascertain the characters’ truthfulness. It apologizes and begs them for aid in finding the being that killed its mate.
Treasure
Consult the random treasure tables in chapter 7 of the Dungeon Master’s Guide to determine the amount of treasure these creatures are carrying. Choose the Individual Treasure table that suits the challenge rating the encountered creatures. Then roll once for each creature that would logically carry treasure on its person.
For example, after the characters defeat the bandits in the tier 1 encounter: Pteranodon Predators, you would roll three times on the Individual Treasure: Challenge 0–4 table. Even though there are six monsters with a CR of 0 to 4 in this encounter, three of them are pteranodons that serve as the halflings’ mounts—they wouldn’t logically carry any treasure.
Other Travel Encounters
This encounter is part of a mini-series of scalable encounters that you can drop in your party’s path as they’re traveling across your campaign setting—whether that’s the Sword Coast, Eberron, Wildemount, or a world of your own creation. Check out the other encounters in this mini-series in the Traveling Encounters tag!
Create A Brand-New Adventurer Acquire New Powers and Adventures Browse All Your D&D Content
Did you like this encounter? Check out the encounters in the Encounter of the Week series. You can also pick up the adventures I've written on the DMs Guild, such as The Temple of Shattered Minds, a suspenseful eldritch mystery with a mind flayer villain. My most recent adventures are included in the Platinum Bestseller Encounters in Avernus, a collection of over 60 unique encounters created by the Guild Adepts, which can be used to enhance your campaign in Avernus or elsewhere in the Nine Hells. Also check out the Platinum Bestseller Tactical Maps: Adventure Atlas, a collection of 88 unique encounters created by the Guild Adepts, which can be paired with the beautiful poster battlemaps in Tactical Maps Reincarnated.
 James Haeck is the lead writer for D&D Beyond, the co-author of Waterdeep: Dragon Heist, Baldur's Gate: Descent into Avernus, and the Critical Role Explorer's Guide to Wildemount, a member of the Guild Adepts, and a freelance writer for Wizards of the Coast, the D&D Adventurers League, and other RPG companies. He lives in Seattle, Washington with his fiancée Hannah and their animal companions Mei and Marzipan. You can find him wasting time on Twitter at @jamesjhaeck.
Also, check out the latest video from D&D Beyond!
-
View User Profile
-
Send Message
Posted Apr 27, 2020Death From Above? Need to figure out a way to put in an HLN-732.
-
View User Profile
-
Send Message
Posted Apr 27, 2020I love the article, but I would change the sphinx encounter so that it's easier to console the sphinx so that my players don't murder-hobo their way through. also, what in the nine hells would have the guts to take on an androsphinx?
-
View User Profile
-
Send Message
Posted Apr 27, 2020Imagine throwing all these encounters at the player characters at once when they are level 20.
-
View User Profile
-
Send Message
Posted Apr 27, 2020Love it. I like the sphinx encounter. Seems like it could be the patron for a warlock I came up with: A hexblade who has a fallen Androshpinx as a patron. The sphinx is black with purple markings and the markings and it's eyes turn to fire when he's angry. Didn't know why he was a fallen Androshpinx. Now I do...
-
View User Profile
-
Send Message
Posted Apr 27, 2020Same! I'm going to do that and turn it into an adventure where they have to find out who killed it for the Androsphinx (or die...).
-
View User Profile
-
Send Message
Posted Apr 28, 2020Such a cool idea!
-
View User Profile
-
Send Message
Posted Apr 28, 2020Typo:
Given that there can be multiple monsters, I assume this should read "when deadly creatures attack".
And:
I assume this should read "pteranodon's rider dies, however, it starts fighting".
This links to the PHB version of the grappling rule:
This should link to the basic rules version instead, which everyone can access: https://www.dndbeyond.com/sources/basic-rules/combat#Grappling
"Terran" is missing an "r" here:
Besides that... These are some really cool encounters! Love the concepts.
-
View User Profile
-
Send Message
Posted Apr 28, 2020Love these encounters. I love how they can fit in anywhere keep it up.
-
View User Profile
-
Send Message
Posted Apr 28, 2020I love these scaled encounters. The Sphinx one, in particular, is incredible. Great work!
-
View User Profile
-
Send Message
Posted Apr 28, 2020All you need to beat most of these encounters is an Aarakocra because most of the creatures/riders aren’t that good in melee range
-
View User Profile
-
Send Message
Posted Apr 28, 2020Murder Hobos
-
View User Profile
-
Send Message
Posted Apr 28, 2020LOLWhat? A wizard is not great in melee range, but a wyvern certainly is, as are rocs and androsphynxes. And a single Aarakocra is probably not going to do well against multiple pteranodon-riding halflings.
-
View User Profile
-
Send Message
Posted Apr 28, 2020Sorry, I wasn’t clear. What I meant was an Aarakocra in the party.
-
View User Profile
-
Send Message
Posted Apr 28, 2020Thanks! Personally I feel like D&D has started to become a way to vent out peoples rage as murderers, so I like to have as much social interaction as possible while keeping my players content.
-
View User Profile
-
Send Message
Posted Apr 28, 2020D&D was descended from a tabletop combat game. It's always been about fighting over social interaction. It's only been in the last few editions that they've tried to push the idea of interacting with monsters in a manner other than "kill it and take its stuff."
-
View User Profile
-
Send Message
Posted Apr 30, 2020This is great, thank you!
-
View User Profile
-
Send Message
Posted Apr 30, 2020Cool. I like it.
-
View User Profile
-
Send Message
Posted May 4, 2020Something already in the Nine Hells. I'd tack it on to an Avernus run. ^-^
-
View User Profile
-
Send Message
Posted Jun 18, 2020That wouldn't be very fun, nobody would die
-
View User Profile
-
Send Message
Posted Jun 24, 2020I like that mufasas in this :)