 Outlining is the adventure-writer’s secret weapon. It’s so easy to sit down to write, an amazing story idea bubbling in your head, and find yourself stymied by a blank page. Where do you start? What if you forget your ideas for one part of the adventure while working on another part? No matter who you are, whether you’re a brand-new Dungeon Master, an amateur game designer, or a pro working on your next big project, creating an outline of your adventure is all but guaranteed to lead you to making better adventures, faster.
If you’re new to outlining, check out Shawn Merwin’s excellent article on Outlines and Frameworks, part of his Let’s Design and Adventure! series for D&D Beyond.
Brain Cleaning
My computer desk fluctuates wildly between being clean as a whistle and being a disaster area. Cleaning your desk (or your desktop) isn’t the most glamorous of tasks, but having a clean and organized space to work frees your mind of distractions and diversions. Even subconsciously, it’s hard to focus on the work that’s right in front of you when “what’s right in front of you” also includes a trio of empty cola cans, a stack of mail, an unwashed plate… You get the picture.
Outlining’s first benefit is the task of mental organization. It’s like notetaking. If you have ideas, start by slamming them onto the page as fast as you can, so nothing gets lost in the jumble of your mind. This is like upending a jigsaw puzzle box onto a table, and then rapidly organizing the pieces by color (of course, since your mind is filled with things other than game design, there will doubtless be a few pieces from unrelated puzzles in there, so part of organizing is deleting them from your nascent outline).
Now you have your existing ideas on the page, in a vaguely organized form. It doesn’t have to be perfectly tidy, just so long as you know where to find all of your ideas. And if there are still pieces missing, that’s fine. You’ve only just begun writing; it’s perfectly reasonable for there to be plot holes wide enough to drive a bus through at this stage.
How to Make an Outline
Now, it’s time to outline. In school, you may have learned how to make a Harvard Outline to organize your thoughts while writing essays. The process of outlining a D&D adventure is very similar. In this style of outline, you start with a topic, break that topic down into subtopics, and go as deep into sub-subtopics as needed. For instance, if you’re writing a section called “NPCs in this Adventure,” then each individual NPC would be a subtopic. For another example, in a section called “Dungeon of Death (First Floor),” each room would be a subtopic, and you might choose to add supporting subtopics describing each room’s treasure, environmental hazards, and so forth.
It could look like this:
1. Dungeon of Death (First Floor)
a. Room 1: Entrance
b. Room 2: Kobold Crossroads
i. Monsters
ii. Traps
iii. Treasure
c. Room 3… [etc.]
2. Dungeon of Death (Second Floor)
You can extend this outline as far as you need to, until your entire dungeon, or your entire adventure, or your entire product is organized. Beyond this basic phase, this is where the act of outlining starts to diverge for Dungeon Masters writing an adventure for their home game and for game designers writing an adventure as a product they intend to sell.
Outlining for your Home Game
While creating an outline for your game, you may discover that your outline is incredibly useful for planning out a linear narrative, but begins to strain at the seams when trying to account for branching paths or player choice. This is true; a Harvard outline was originally designed as an essay-writing aid, a format which isn’t known for its nonlinearity or concern for player agency. As any experienced Dungeon Master knows, your players are liable to do whatever they want at any given time.
In this context, outlines are most useful for two things. The simplest is creating a room-by-room explanation of a dungeon (or any other explorable environment). The secret here is pairing your outline with a map of your dungeon. Since most dungeons can be explored nonlinearly, the order you detail your rooms in doesn’t matter (much), except insofar as how each room’s number on your outline should correspond to the room with the same number on your map. As long as you can easily track down which room is numbered where on your outline when your players visit that room, you’ll be in good shape.
The second, and more complex, use for outlines in your game is to outline the simplest, most linear version of your adventure’s story. This is your blueprint for how the story will go if your players follow the plot perfectly. Don’t get too attached to this outline; there’s almost no way that your adventure will go perfectly to plan. Instead, use it as long as you can, and be prepared to improvise when your players inevitably forge their own path. Then, between sessions, start from wherever they broke your “script” and create a new outline to help guide your next session.
In case it’s not clear by now, your outline should be rough, messy, and more akin to notes than a final product. If you’re writing full sentences in your outline, you’re probably lavishing too much detail on it.
Outlining for Publication
If you’re planning on writing a D&D adventure to publish on the DMs Guild, congratulations, and good luck! An outline is the best place to start, and is even more useful when designing for a product than for a home game. The best way to describe the outlining process in this context is to start with an example. Start by looking at any published D&D adventure; let’s use Lost Mine of Phandelver, the adventure found in the D&D Starter Set, as a common example.
Start by looking at the adventure’s Table of Contents. Can you see how this book is already arranged in an outline format? Main topics like Introduction, Part 1: Goblin Arrows, Part 2: Phandalin—and so on—are all main topics. All of the subsections beneath each main section, such as “Goblin Ambush” under Part 1: Goblin Arrows, are subtopics in this outline. If you click on any one of those subsections, you’ll find further subsections in this hierarchy. Beneath “Goblin Ambush,” you’ll find “Goblin Trail,” and “Awarding Experience Points.”
If you look each one of these headers, you’ll notice that they’re designed differently (this is much clearer in print D&D books, rather than on D&D Beyond). A chapter uses big, serif font. D&D house style (which you can find in the free style guide resources available on the DMs Guild that will help make your product look and feel official) calls this topmost topic a Chapter Header. Beneath the Chapter Header, you will frequently find that main topics use a big, serif font just slightly smaller than the chapter header (which the D&D style guide calls Header 1), and its subtopics use a smaller font with an underline (which the D&D style guide calls Header 2), and further subtopics use an even smaller font with no underline (called Header 3).
Subtopics beneath Header 3 are indented, bolded and italicized, and end with a period (and are called an Inline Subheader). This subheader is effectively a Header 4, and no D&D product goes deeper than a “Header 4.” Because of this, you never want your outline to go deeper than Main Topic, three nested subtopics beneath a main topic.
Have you noticed the true power of an outline when designing a D&D adventure? Once you’ve created your outline, you basically already have the skeleton of your product. You may want to meddle with your outline while you’re writing, and that’s perfectly fine, but a lot of the hard work of organizing your adventure is completely out of the way. You have a skeletal adventure now! That means all that’s left is to…
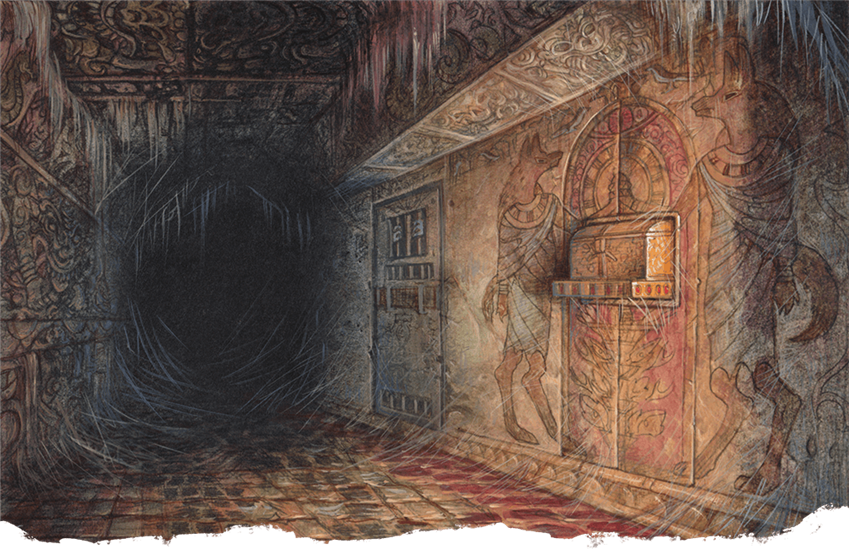
Put Meat on Those Bones
The hard work is done! Now you just have to write an adventure! Even if it seems like the real hard work has only just begun, you may find that having an outline done has cleared the way for you. Even when you have a clear and strong adventure idea in your head, tiny roadblocks like organization and structure often cause even experienced writers to second-guess themselves, slow down, procrastinate, and generally turn a task that could have been done in just an hour or two into an all-day slog. (Trust me, I know from experience.)
Creating an outline has turned the grueling task of writing and structuring as you go into a simple fill-in-the-blanks task. More than that, it’s broken down the daunting task of writing an adventure into a dozen smaller, more manageable tasks of: create an NPC, write an encounter, and design a magic item. A lot of great productivity advice boils down to “break up your big tasks into little ones,” and outlining your adventure is the ultimate expression of dividing tasks into bite-sized bits.
If you’re having trouble figuring out how to flesh out the skeleton of your adventure, take a look at any of the dozens of official adventures for fifth edition D&D and see how they do it. As mentioned above, every single one of these books is just a massive outline, fleshed out section-by-section until there’s a complete story. If there’s one piece of advice I want you to remember, it’s that reading the books, taking them apart, and reverse-engineering them in your head is one of the best ways to learn how to write D&D. Meld those lessons with your own creative instincts, and you’ll be a great game designer.
Parting Thoughts
By the way, if you’re looking at your adventure’s outline and wondering where to start, the best place is wherever feels easiest. Try starting at the beginning, but if that doesn’t work, try poking around other places. If you have a great idea for an encounter, just start there! One of my favorite things about outlines is how it reveals the artificial nature of writing; I often feel locked into starting from the beginning and ending at the end. But even in a first draft you can start anywhere, and then work backwards, forwards—however you like. And in a highly structured medium like RPGs, where you’re aiming for your writing to be as comprehendible as possible, making sure a reader can start from anywhere and not be too confused is a virtue.
Similarly, while you’re building your adventure from the skeleton out, think about how you want your adventure to flow. It’s easy to move a section around entirely if, an hour into writing, you find that you need a confrontation that happens in chapter 2 to actually happen in chapter 4. While the bones are still bones, you can just swap them around. But if you’ve already got a bunch of connective tissue tying that confrontation to the events of chapter 2, you’ll have to take a lot of time scrubbing all that work away, making it clean again, and building up all that connective tissue from scratch again.
Have you ever created an adventure from an outline? How do you create adventures for your home game? Let us know in the comments!
Create A Brand-New Adventurer Acquire New Powers and Adventures Browse All Your D&D Content
 James Haeck is the lead writer for D&D Beyond, the co-author of Waterdeep: Dragon Heist, Baldur's Gate: Descent into Avernus, and the Critical Role Explorer's Guide to Wildemount, a member of the Guild Adepts, and a freelance writer for Wizards of the Coast, the D&D Adventurers League, and other RPG companies. He lives in Seattle, Washington with his fiancée Hannah and their animal companions Mei and Marzipan. You can find him wasting time on Twitter at @jamesjhaeck.

-
View User Profile
-
Send Message
Posted Sep 30, 2020sounds good; I have that problem a good bit
-
View User Profile
-
Send Message
Posted Sep 30, 20206th and great article!
-
View User Profile
-
Send Message
Posted Sep 30, 2020A very informative article. Now if you could do an article on procrastination that would be great.
-
View User Profile
-
Send Message
Posted Sep 30, 2020This was the perfect time to drop this. I've long been planning to turn my favorite one shot into an adventure I can publish, and had scheduled starting the prosess tomorrow. Perfect time to read about and be reminded about making an outline. Already feeling so much better about the writing process now! Thank you:)
-
View User Profile
-
Send Message
Posted Sep 30, 2020My outline often takes the form of a timeline, where multiple events happen. That might be because I like to keep campaigns to a relatively small area that changes over time.
I might start with something like this for an urban campaign:
Day 1: Plot hook (Customize to characters)
Filler events leading up to finale on day 10.
Day 10: Evil Cult attempts to open portal to ???.
I'll then fill in the activities that are happening behind the scenes (that NPC's might mention) and the ones the players can interact with. I find that it gives depth to the world, and helps make the bad guys feel less 2d.
-
View User Profile
-
Send Message
Posted Sep 30, 2020He'll get around to it later.
EDIT: Whoops, this was meant to be a reply to the request for one on procrastination.
-
View User Profile
-
Send Message
Posted Sep 30, 2020i have this problem and use already made worlds to help but good job and how come you are the only one posting articles nowadays
-
View User Profile
-
Send Message
Posted Sep 30, 2020He'll do that when he gets around to it.... :D
Great article, James!
-
View User Profile
-
Send Message
Posted Sep 30, 2020Super useful. I’ve personally done this and it works wonders in my campaigns.
-
View User Profile
-
Send Message
Posted Oct 1, 2020I actually stumbled on this method for my Waterdeep Campaign. My players were happy living their noble lives in Waterdeep and after 4 sessions of trying to give them motivated to follow the main plot points of the story I decided that certain encounters and events would unfold without the players being apart of them. So I wrote out the entire story assuming the players wouldn’t be present for the events. In doing this I got to explore the multiple factions involved in this story and would run combat simulations using DND Beyonds Encounter Builder. I continued to try and involve them in the books main plot points and at a certain point they did end up participating and completing the campaign (8months). Afterwards I shared with them the final outline of the story which showed them the behind the scenes encounters they didn’t participate in. After the campaign we had a full session where they just asked me, “what if we had done this or that” which I had written out in previous outlines. I had a blast looking through the eyes of each faction and my players said it made the world feel alive and they got to see how their decisions impacted the world.
-
View User Profile
-
Send Message
Posted Oct 1, 2020Just started writing down the ideas for a new campaign. Since I have a hard time getting beyond that point, I'll try this method and see how it helps.
-
View User Profile
-
Send Message
Posted Oct 1, 2020I have really been digging using trello to organize my outlines now. I’m sure any ticket tool like it can work as well. Just being able to add a picture then add content and sub tickets is incredibly useful once you get in the habbit. Previously I had a few docs I threw stuff on, now I have nice boards and can drag my random ideas around into an outline I like.
I honestly had tried it before, but it wasn’t until I got good at outlining in general that the tool multiplied my output.
-
View User Profile
-
Send Message
Posted Oct 1, 2020Great article. When can we expect an adventure outline template in Beyond?
-
View User Profile
-
Send Message
Posted Oct 1, 2020Story and dungeons both branch according to the choices made. Because of this, I highly recommend using a mind map. There are apps that are capable of this that cost next to nothing. You can certainly get the job done with an outline and this is a fine article, but it's very powerful to be able to organize relationships and hierarchies visually. Why cross reference an outline with a map when you can make a map out of your outline?
-
View User Profile
-
Send Message
Posted Oct 1, 2020Great tips, thanks!!!
-
View User Profile
-
Send Message
Posted Oct 1, 2020Great article! I feel like sometimes I work on my campaign and then all of a sudden, stuff goes a different way, my players do something different, and my work is gone. Could you make an article on making campaigns flexible and have different endings?alsobringbackspellspotlightandhomebrewhorrors
-
View User Profile
-
Send Message
Posted Oct 1, 2020:P
-
View User Profile
-
Send Message
Posted Oct 1, 2020James, you should go clean shaven.
-
View User Profile
-
Send Message
Posted Oct 1, 2020Awesome Article! This is helping out tremendously!
-
View User Profile
-
Send Message
Posted Oct 1, 2020I find if flowcharts to be more useful during the development stage to prevent linear design thought but Outlines are great when you get down to writing it.