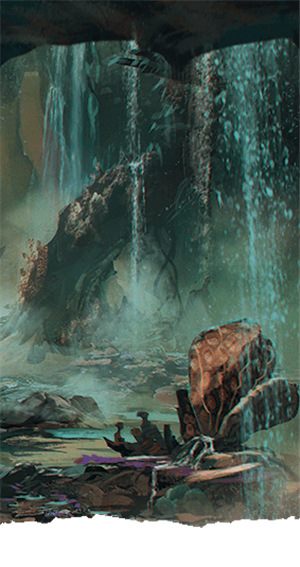
 Stormy seas rock your vessel, tossing her about like a toy in the jaws of a hound. Thunder rolls in the distance. Then, an arc of lightning splits the sky, and the sound like an exploding fireball all but bursts your eardrums. Your mainmast, struck by lightning, burns, splinters, and topples onto the deck like a felled oak. The last thing you hear is the cracking of wood as the deck explodes into splinters, and the ship is torn asunder. All goes black.
You awaken in shackles, half-submerged in water, and surrounded by salmon-pink coral. You survived, but what fate awaits you now? The sound of soggy footsteps echo down the hallway. A creature approaches with an answer.
This week’s encounter is Coral Colosseum, a combat encounter in which the characters must prove themselves as worthy gladiators to escape the clutches of a ruthless sahuagin baron. This encounter can serve as a follow-up to Encounter of the Week: Sharkfin Shipwreck, or as a stand-alone mini-adventure. It could also serve as an introduction to Ghosts of Saltmarsh, which releases on May 21st, 2019.
Combat Encounter: Coral Colosseum
This combat encounter is balanced for a party of 2nd-level characters, but can be scaled up to challenge a higher-level party.
Sahuagin are rightly feared as the sea’s true masters in seaside towns like Saltmarsh. Countless squabbling sahuagin baronies dot the rocky coast of the Azure Sea, and the characters have stumbled into the clutches of a mighty sahuagin known as Baron Razorfang. Their capture may be the result of failing the skill challenge in Encounter of the Week: Sharkfin Shipwreck, or you could simply begin their adventures with them in chains. Baron Razorfang is a cruel being that loves to watch his humanoid prisoners battle to the death with his menagerie of aquatic beasts—but he is also magnanimous to his victorious prisoners. All who prevail in his coral colosseum are allowed to go free.
Sahuagin NPCs
If the characters are higher than 2nd level, they may encounter stronger sahuagin than the standard specimen found in the Monster Manual. These sahuagin use NPC stat blocks like veteran and gladiator, but they have the Blood Frenzy, Limited Amphibiousness, and Shark Telepathy features of a sahuagin.
Encounter Summary
Below is a map of the sahuagin lair (made from a portion of a map found in appendix C of the Dungeon Master’s Guide). The scale of the map is one square = 5 feet. The four areas that make up the lair are described in full below, but a summary of the lair is:
- Sahuagin Prison. The characters awaken here, shackled to the rocks.
- Proving Grounds. The characters face their first opponent here to prove their worth, and then are escorted to the eastern colosseum to battle for Baron Razorfang’s pleasure.
- Coral Colosseum. Here, the characters battle one of Razorfang’s aquatic pets for the chance to win their freedom.
- Cliffside Exit. This passage winds upward to the top of the cliffs, letting victorious champions out onto dry land.
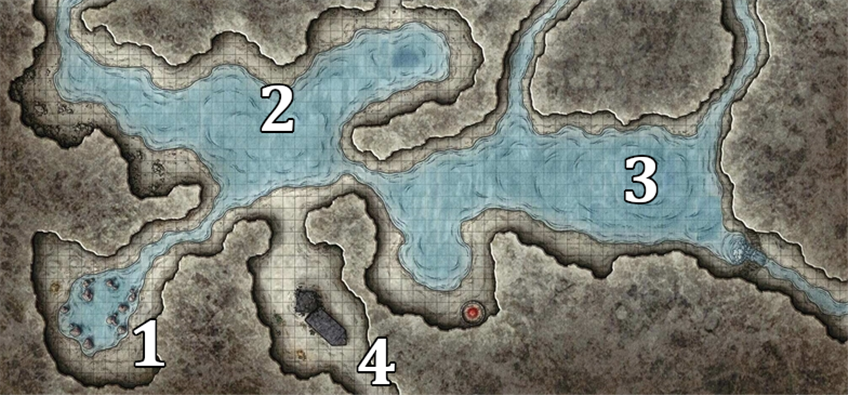
Any unmarked passages lead back to the stormy sea—or to an area of your own creation, if you want to expand the sahuagin lair into a larger dungeon. The water in this chamber is about 2-1/2 feet high, and is difficult terrain for any creature without a swimming speed.
Encounter Start
When the characters suffer a shipwreck, or are captured while at sea, read or paraphrase the following introductory text:
You awaken, only to find the lower half of your body submerged in brackish, briny water. Something is clenched tight around your wrists; you look up to find iron manacles around each wrist. Your arms are pulled over your head and behind your back, and the manacles’ chains are looped around a tall coral formation. The coral digs painfully into your back, and you notice that you have been stripped of your weapons, armor, and equipment, and are only wearing your plain, waterlogged clothes.
Wet footsteps echo down the hallway. Something is approaching. What do you do?
The characters are imprisoned in area 1 (see below). The creatures approaching them are a sahuagin jail guard and a sahuagin priestess known as Lady Brine. The priestess touches her throat and casts tongues upon herself. She speaks proudly and directly to the characters, and relays the following information; if the characters interject and ask her questions, she answers to the best of her ability:
- Prisoners, you are the exalted guests of Baron Razorfang, lord of the northern coast.
- Though you are imprisoned, and may die soon, you have the chance to win your freedom.
- You will be freed if you defeat one of the baron’s prized beasts in a gladiatorial bout in the Coral Colosseum.
- To qualify for this honor, you must first prove your worth against the other prisoners in the proving grounds.
- Now that you are awake, you may visit the proving grounds whenever you wish—simply call for a guard and you will be provided with a dueling weapon.
If the characters ask to be freed, the guard lifts their manacles from the coral pillar, and leads them into the proving grounds (area 2).
At Higher Levels: If the characters are at least 5th level, they are approached by three priestesses instead of one. If the characters are at least 11th level, the three priestesses are mages with sahuagin traits (see “Sahuagin NPCs,” above).
1. Sahuagin Prison
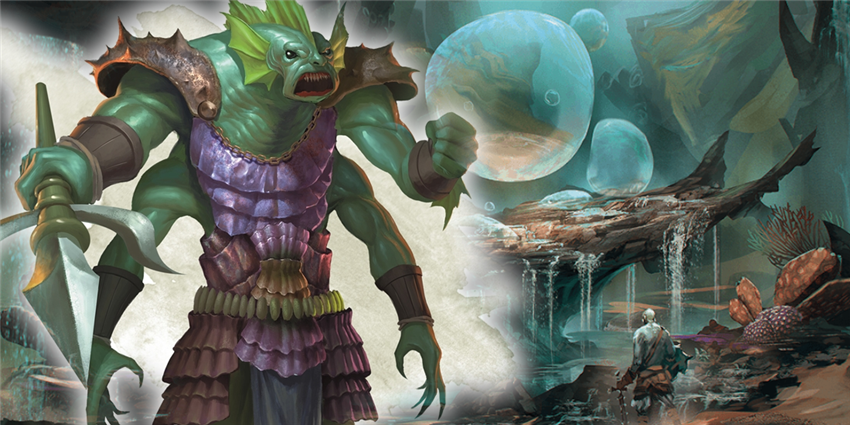
This prison is filled with six-foot-tall outcroppings of salmon-pink coral. It would be beautiful if most of these pillars weren’t adorned with the desiccated and salt-rimed corpses of prisoners unable or unwilling to fight for their freedom.
A character that searches the pool can make a DC 13 Wisdom (Perception) check. On a success, they find a mace. If the sahuagin priestess is in the room, the character must first make a successful DC 16 Dexterity (Stealth) check. On a failure, the priestess commands one of the guards to pull the character out of the pool and get them back in line.
At Higher Levels: If the characters are at least 5th level, this mace is a +1 mace.
2. Proving Grounds
 Once all of the characters are brought to the proving grounds, their manacles are unlocked, and they are given a club. (Note that most cantrips don’t require material components, so spellcasters can cast most of their cantrips, even without their equipment. Be sure spellcasters note which spells and cantrips they have prepared which can be cast without a material [“M”] component.)
The proving grounds have four commoners and two thugs standing around the edge of the room, shivering. The thugs have already won their weapons and armor back from proving themselves, but they’re too scared to advance and face the baron’s monster. Once the characters tell the sahuagin priestess that they’re prepared to fight, she bellows to the assembled prisoners: “Fight, you slugs! Prove that you are worthy to win your freedom from the baron!”
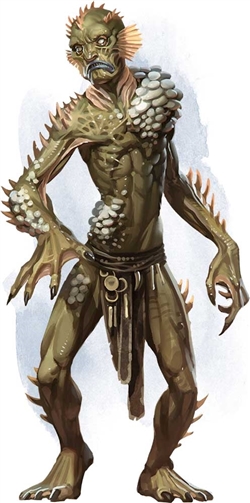
The sahuagin priestess and ten sahuagin stand watch throughout this chamber, to prevent any riots or escapes. If a character attempts to flee, the priestess bellows a warning. If they try again, any nearby sahuagin attack and try to beat the character into submission.
Roll Initiative! The fight is ostensibly a free-for-all, but if the characters choose to team up, one of the thugs shouts to the other NPC combatants that they should team up, too. The characters can attempt to make a successful DC 13 group Charisma (Deception) check to fool the prisoners into think that they aren’t actually fighting as a team.
Defeat. The characters’ foes are merciless; if the characters are defeated here, they are killed outright.
Success. If the characters are victorious (either by killing the other prisoners or by knocking them out), the sahuagin priestess congratulates them on their victory, and asks if they wish to take a short rest before meeting the baron. Once the rest is over (or if it is refused), she commands a guard to retrieve their weapons and armor from deeper in the lair. The guard runs back towards one of the unmarked passages, and returns 10 minutes later with their equipment. Whenever the characters are ready, the priestess escorts them to the colosseum (area 3), and announces them to the baron.
At Higher Levels: If the characters are at least 5th level, the thugs are replaced with veterans, and the DC of the Charisma (Deception) check is increased to 15. Additionally, the sahuagin guards watching the chamber use veteran statistics.
If the characters are at least 11th level, the two thugs are replaced with five gladiators, and the DC of the Charisma (Deception) check is increased to 18. Additionally, the sahuagin guards watching the chamber use sahuagin baron statistics.
3. Coral Colosseum
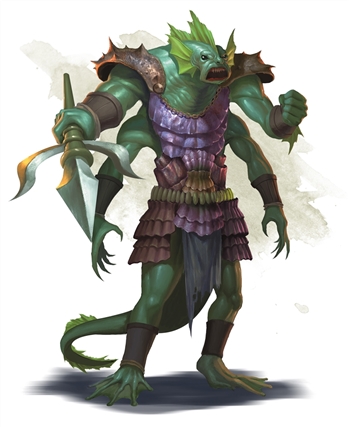 When the characters enter this chamber, the ten sahuagin guards from area 2 follow them. Read or paraphrase the following:
You enter a chamber with walls lined by coral of all colors of the rainbow, illuminated by motes of floating light.
“Your Excellency, Baron Razorfang!” roars the priestess as she strides into the colosseum. “I bring before you a group of cunning prisoners—ones who I believe have the slightest chance of overcoming your trial. Your Excellency, you will be treated with a glorious fight this day!”
The baron is a hulk of a sahuagin with an extra pair of muscular arms. He reclines on a chair made from a giant conch shell in the south end of the chamber, by a crackling fire. Several human slaves pour jugs of salt water on him every few seconds to keep him hydrated. The baron guffaws as he looks at you.
“Warriors?” he grunts. “They look more like weaklings to me, priestess! So be it, surface-dwellers. In my mercy, I grant you one question each before you die, if you wish.”
If the characters ask any questions, Baron Razorfang answers them to the best of his ability. Once he has answered as many questions as he can, he raises all four of his arms and bellows, “Enough! You fight for my amusement now, land-walkers! Push them into the water, and release the beasts!”
The sahuagin guards make a Strength (Athletics) check opposed by each character’s Strength (Athletics) or Dexterity (Acrobatics) check, and push them into the water on a success. If a character resists, the sahuagin guard levels its spear at the character, and the baron cackles. “You’ll want to take a dip, dry-skinned one. Or else.” If the character continues to resist, the sahuagin attack the character until they are knocked unconscious or until they leap into the water.
Water. The water in this chamber is 12 feet deep.
Beasts. Two hunter sharks swim into the water from the passages to the north. The baron controls each of them with his Shark Telepathy, and the sharks fight using surprisingly clever tactics because of it. They gang up on one adventurer and focus their attacks until that character is reduced to 0 hit points, then move on.
Defeat. The baron cackles and claps his hands as characters are defeated, and enjoys seeing their bodies ripped apart and devoured by his sharks. Defeat here means death.
Success. If the characters are successful, Baron Razorfang nods his head in satisfaction, then breaks out into applause with all four arms. His court follows suit. “Impressive!” he says. “You fight so well, I wish I could keep you! But surely that’s not possible… I bet you would figure out how to kill even me, if I kept you here long enough!”
The baron bursts into uproarious laughter. When he eventually stops, he waves his left hands dismissively. “Let them go, priestess. Raiders! Find me another crop of shipwrecks to amuse me.”
The priestess then shows the characters to the exit (area 4), and allows them to walk free.
At Higher Levels: If the characters are at least 5th level, the hunter sharks are joined by a giant shark. If the characters are at least 11th level, the hunter sharks are replaced by three giant sharks, and Baron Razorfang himself joins the fight once the first shark is killed.
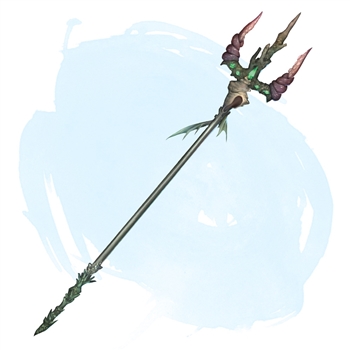 Finally, if the characters are victorious and at least 5th level, the baron tosses a trident of fish command at one of the party’s warriors. “You’ve proved yourself worthy of it. Wield it in the name of Razorfang,” he guffaws.
If the characters are victorious and at least 11th level, the priestess also surreptitiously bestows upon them an old toy that the baron grew weary of: a wand of wonder, in addition to the baron’s trident of fish command.
4. Cliffside Exit
Two sahuagin priestesses and four sahuagin stand guard here, and use hold person and brute force to stop any prisoners from escaping. The tunnel beyond here spirals upward for about 1000 feet before reaching the surface. If the characters were victorious in the baron’s combat trial, these guards let them go free.
A shattered runestone lies in the middle of this chamber. It has text written in Abyssal, which you can use to deliver any ominous foreshadowing you wish.
At Higher Levels: If the characters are at least 5th level, the sahuagin guards watching the chamber use veteran statistics. If the characters are at least 11th level, the sahuagin guards watching the chamber use sahuagin baron statistics.
Conclusion
The heart of the barony of Razorfang is a semi-aquatic cavern built into the cliffs about 20 miles north of Saltmarsh (or a port town in your own campaign setting). Characters that manage to escape have a long trek ahead of them before they arrive in town; easily long enough for another encounter or two! Soon, the real adventure will begin in Ghosts of Saltmarsh.
Did you like this encounter? If you want to read more adventures, take a look at the other encounters in the Encounter of the Week series! If you're looking for full adventures instead of short encounters, you can pick up the adventures I've written on the DMs Guild, such as The Temple of Shattered Minds, a suspenseful eldritch mystery with a mind flayer villain (for 3rd level characters). My most recent adventures are included in the Gold Best Seller Tactical Maps: Adventure Atlas, a collection of 88 unique encounters created by the Guild Adepts, which can be paired with the beautiful tactical poster maps in Tactical Maps Reincarnated, recently published by Wizards of the Coast.
 James Haeck is the lead writer for D&D Beyond, the co-author of Waterdeep: Dragon Heist and the Critical Role Tal'Dorei Campaign Setting, the DM of Worlds Apart, and a freelance writer for Wizards of the Coast, the D&D Adventurers League, and Kobold Press. He lives in Seattle, Washington with his partner Hannah and their feline adventurers Mei and Marzipan. You can usually find him wasting time on Twitter at @jamesjhaeck.
-
View User Profile
-
Send Message
Posted May 6, 2019What is the mace replaced by? Whatever tool tip you tried to use did not work, and I am curious. Thanks!
-
View User Profile
-
Send Message
Posted May 6, 2019I like that you are theming many of your encounters around aquatic elements in advance of the next book';s release. This is very useful to my own campaign.
James, do you have the map at any better resolution? Ideally, without the numbers on it, but I'll take what I can get :)
-
View User Profile
-
Send Message
Posted May 6, 2019It's part of one of the maps from the DMG. I believe it's the bottom of the fifth map.
https://www.dndbeyond.com/sources/dmg/appendix-c-maps
-
View User Profile
-
Send Message
Posted May 6, 2019Usually, Mike Schley has all of his maps available for purchase in high res on his website, but this one is conspicuously absent. I would send him an email, plus the low-res pic that Aldero included above, and see if you can purchase it as an individual piece.
-
View User Profile
-
Send Message
Posted May 6, 2019I forgot to prepare for today's session, so I'm definitely going to use this in a half hour. Previously, this group has gone through the Sharkfin Shipwreck encounter. Presently, they are racing against the clock to uncover and stop Umberlee and her underwater armies. This wil make an excellent adventure. Keep up the good work James!
-
View User Profile
-
Send Message
Posted May 6, 2019James, thanks for the link to Mike Schley's page!
-
View User Profile
-
Send Message
Posted May 6, 2019Love this! What a fun encounter.
-
View User Profile
-
Send Message
Posted May 6, 2019A plus one mace replaced the regular mace dracolupus
-
View User Profile
-
Send Message
Posted May 6, 2019Thank you!!
-
View User Profile
-
Send Message
Posted May 7, 2019your welcome
-
View User Profile
-
Send Message
Posted May 7, 2019Pretty sure my bard character would try and recruit the other prisoners into a revolt.
-
View User Profile
-
Send Message
Posted May 7, 2019not against those guards
-
View User Profile
-
Send Message
Posted May 7, 2019Hey James, you so babyfaced. You will look young forever. Great adventure, I always enjoy the prisoner start. Its so fun to see there face's when you tell the party they have no weapons, no armor & no gear. I do have one question, the Mace, I can see hiding it for awhile but once your in the proving ground theres no real way to hide it. Am I missing something or can you drop some of your master wisdom on me, that would be great.
Thanks James & have a great day.
-
View User Profile
-
Send Message
Posted May 7, 2019it is not very easy to hide, maybe it is only for smash and run, like kill the preist, get theier stuff and leave stupid engitzh keyboard
-
View User Profile
-
Send Message
Posted May 7, 2019Update to this (TL;DR at bottom)
First, a note regarding my part's composition- it is rather unoptimized. Four Elements Monk with only 14 DEX&WIS (rolled for stats), Swashbuckler Rogue who doesn't pay a lot of attention in the game, Valor Bard with no healing spells, Arcane Archer Fighter, and Illusion Wizard who primarily uses Evocation spells.
Second, a note regarding my edits to the encounter- Due to it being "designed for level 2 characters" and my party being level 3 and previously ploughing through such encounters as-written, I upped some of the creatures, namely putting 4 Thugs and 2 Commoners to the Proving Grounds, and adding a Reef Shark to the Arena.
On to the actual play report. The party spent an hour trying to fight their way out of the cuffs (with the Monk freezing the manacles and breaking them open with a nat20+3 Athletics) and through the Priestess and guard (Bard Diss. Whispering the guard away and dropping a Silence spell on the entrance to the chamber so the Monk can solo the Priestess). It took several Grapple attempts to pull the monk off the priestess. Finally, after all 10 guards were brought into the chamber and order was restored, the adventure ran pretty much as-written, though they did not attempt to search the room they were bound in and immediately chose to move to the proving ground.
From there, the group split pretty much instantly, with the Bard (a Triton) attempting to hide in the water on the floor (I allowed it, given his small stature) and casting Dissonant Whispers (the only spell he could cast without Materials. The Monk and Rogue went to fight the Commoners that were killing eachother, and the Fighter used his Slippers of Spider Climbing (from the Ensnared by Ettercaps encounter, btw. We ruled he'd keep them because they were just clothes) to climb up to the ceiling and begin reigning rocks on enemies. Everything fell apart when the Bard, who was being pummeled by two Thugs, cast Fog Cloud (racial trait), which slowed the encounter to a crawl as many combatants were caught in it.
Eventually, they proved themselves, dropping the Monk to 0 but not giving the enemies the chance to finish her off. I allowed the Monk to be healed by the Priestess for the short rest, though the Bard and Wizard each had 2 spell slots left (the Wizard regaining a second level over the short rest) for the final encounter. The triton jumped right into the water and the Rogue failed his acrobatics check and was pushed in, but the other 3 all resisted, getting the encounter off to an awkward start. The Baron gave them one round of movement speed to maneuver themselves away from the edge of the pool befor releasing the sharks. They tore through the sharks pretty quick, with the Wizard casting Alter Self to gain a swim speed and the Triton already having a swim speed, and the fighter using a Crossbow (I allow Arcane Shot to be used through Crossbows), the Rogue using two daggers, and the Monk using a shortsword. While the Rogue and Wizard were reduced to 0, the encounter never felt very threatening, ending up being a battle of attrition, really.
Side Note: I didn't realize the mechanical advantage of having a Reef Shark team up with Hunter sharks; the Pack Tactics from Reef Shark allow it advantage to deal initial damage, then the Hunter Shark's Blood Frenzy grants advantage to further damage against them. Will definitely be using in the future.
TL;DR: the players loved the whole thing, even though the session took twice as long as I'd told them it would (though i suppose that comes with the territory). The Proving Grounds fight was a little strong for the party, though that was likely due to my edits, and the Shark fight didn't feel like a challenge, even though it resulted in two incapacitations.
In retrospect, the only things I might have changed would have been making it 3 Commoners and 3 Thugs, and either giving the Hunter Sharks multiattack or adding a second Reef Shark. I also would have made the Mace in the prison chamber a little more obvious. If the party was level 2, i would likely have kept the 4 Commoners/2Thugs, but might have added the one Reef Shark anyway, so that there is a little bit more going for the sharks.
-
View User Profile
-
Send Message
Posted May 7, 2019Fantastic report, Jaces! It sounds like things went awry in just the right way.
-
View User Profile
-
Send Message
Posted May 7, 2019Great encounter but an a visualization issue at the start. If your hands are cuffed and chained above your head, and then are let down but not uncuffed, how do they end up behind your back? I for one definitely am not that flexible for that to happen without breaking bones and tearing muscle and flesh...
-
View User Profile
-
Send Message
Posted May 7, 2019That's an excellent way to put it, James!
-
View User Profile
-
Send Message
Posted May 7, 2019Hm, that's a fair point. Let's fix that.
-
View User Profile
-
Send Message
Posted May 7, 2019The revolution has begun!🤣