


The latest D&D campaign setting explores the world of Critical Role in Explorer's Guide to Wildemount, now available for preorder on the D&D Beyond Marketplace. Wildemount is a land of dark and epic fantasy, with low-level characters fighting to survive in a world full of common folk who are just as mud-splattered and hungry as they are—and high-level characters contending with the fate of nations and magic that has the power to bring about the end of the world, or the creation of a new one. This series of Encounters of the Week are one-shot adventures for low-level characters set in the four major regions of Wildemount: the grim, authoritarian Dwendalian Empire; in Xhorhas, home of their mortal rival the Kryn Dynasty; the tropical and politically neutral Menagerie Coast; and the frozen and forbidden Greying Wildlands, home to strange mystics and every sort of criminal scum.
This week’s encounter is Cackles in the Dark, a combat and exploration-focused encounter set in the Greying WIldlands that pits adventurers against wild, unruly nature and dark fey creatures. The characters are tasked to find and rescue a child taken by a coven of hags before they are used as an unwilling test subject in the hags’ dark machinations. The hags reside in the ruins of the elven city Molaesmyr, a city felled by dark magic that has been corrupting the surrounding Savalirwood and its denizens for centuries.
The Ruins of Molaesmyr
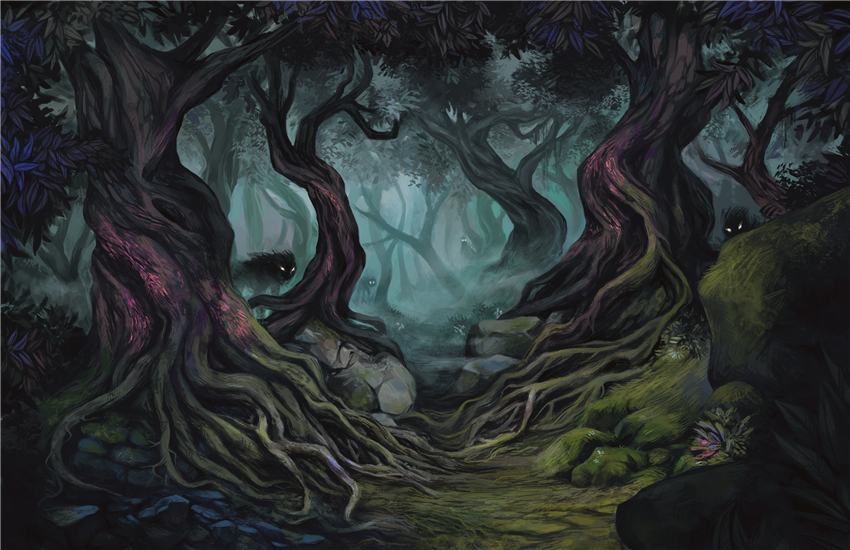
Over two centuries ago, the elven city of Molaesmyr was a thriving metropolis of higher learning, a testament to the craftsmanship of the elves nestled among the beautiful Savalirwood. These days, however, the city lies abandoned and in ruins, the source of a foul magic that seeps outward from the city’s epicenter, corrupting the creatures of the Savalirwood and those elves that chose to stay behind after the fall of the city, whether unwilling or unable. City and forest merge in a twisted union; the magic transforms the forest around Molaesmyr, blighting the land, twisting the forest’s denizens, transforming plant, beast, and elf alike into horrible shadows of their former selves.
Many adventures brave the ruins to seek what treasures may remain hidden within, but the magic also calls to the city those who would use it to further their dark motives. Three such entities, a coven of green hags, have made their home in the labyrinths beneath Caes Mosor, the city’s central tower. Calling the dark forces of fey and forest to them, Auntie Rottongue, Nanny Filthtouch, and Granny Pustreat send their minions to the nearby town of Shadycreek Run to snatch away unwanted children to use in their experiments: attempts to harness the magic responsible for the fall of the city for themselves.
Dungeon Exploration: Cackles in the Dark
This encounter contains combat encounters suitable for characters of 5th level.
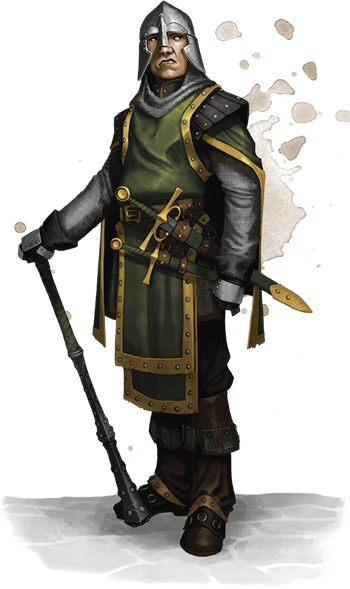
Keelyn, a male half-elf guard in the employ of the infamous Mardoon crime family, meets with the characters at the Landlocked Lady, one of the establishments of Shadycreek Run owned by the Mardoons. He explains that the city has been experiencing a string of disappearances. Read or paraphrase the following:
“Kids nobody cared about, but what did good work for the families if they wanted some coin, just gone! Vanished into thin air. And two nights ago, one of the Mardoon kids went missing as well. Young Ahsira didn’t come back when her guardian called for her.
 “Odder still, the hunters have been noticing trails of grease leading from town into that accursed forest, the Savalirwood. Something rotten’s afoot.”
Ahsira Mardoon is a tiefling girl with dark grey skin and dark hair, and is a distant niece of Ophelia Mardoon, current head of the Mardoon family. She is young and untrained, and uses commoner statistics.
Keelyn goes on to say that some of the hunters brave enough to follow the trails note that they seem to head in the direction of Molaesmyr. On behalf of the Mardoon family, he asks the characters to venture to Molaesmyr and recover Ahsira, and offers them 200 gold for her safe return, and can be haggled up to 300 gold by a character that makes a successful DC 15 Charisma (Persuasion) check. If the characters still seem reluctant, he reminds them that the favor of the Mardoon family is worth more than gold, and that they may also there may also be treasure in the city worth their while to find.
Encounter Start
The encounter begins as the characters approach the ruins of Molaesmyr, after they follow the grease trails that lead through the woods. Read or paraphrase the following:
Before you are the crumbling ruins of a once-glorious city. The forest is fierce in its attempts to reclaim it; vines push through the cobblestone streets and descend from tall trees to snake around towers, creeping ivy curls dark tendrils around buildings, and in the shadows beyond your vision, the wild beasts of the Savalirwood have made new homes of the city’s abandoned buildings.
The grease trails lead to the city’s central tower, Caes Mosor. This tower is the main entrance to the labyrinths below, but reaching the tower is easier said than done. The heroes aren’t the only beings traversing the city’s ruined streets.
Do You Ever Get the Feeling…?
As the characters progress through the ruins, the feeling that they’re being watched is ever present. The hags have employed minions of their own to scout around and report their findings. A trio of mischievous fey creatures called boggles (from Volo’s Guide to Monsters) are following the characters. These are the creatures the hags have been sending to kidnap the children. As they follow the characters, they use their Dimensional Rift trait to flit around and stay out of sight of the characters, while also using their Oil Puddle action to hinder the characters’ progress.
A character that succeeds on a DC 16 Wisdom (Perception) check spots the boggles as they flit across the city’s crumbling rooftops. Additionally, a character that examines the oil puddles and makes a successful DC 13 Intelligence (Arcana) check can identify what may be following them. As the DM, you can determine when and how the boggles may try to slip the characters up.
These boggles are also acting as spies for the hags. Between them, they carry the coven’s hag eye, through which the hags can peer at any given time. The characters do not know when the hags are looking through the eye, and they won’t know the boggles have it unless they are killed, at which point they drop it. The hag eye has an AC of 10, 1 hit point, and has darkvision to a radius of 60 feet. A successful DC 16 Intelligence (Arcana) check is needed to discern the nature of the eye.
Should the green hags peer through their eye and notice the characters, one or two of them may leave the shelter of the labyrinths to further play with their minds. As the DM, you are empowered to have fun with the hags! While they do not attack the characters outright, they use their Mimicry trait and Illusory Appearance action (imitating the cries of children or perhaps appearing as one from a distance) to unsettle the characters.
Navigating Molaesmyr
As the characters travel, feel free to describe to them the desolation they see all around, the battle between nature and civilization as the forest overtakes the city, the visible influence of the foul magics the emanate from beneath the city. Characters must succeed on a series of group DC 17 Wisdom (Survival) checks to successfully navigate the perilous streets. If this group check fails, the party falls victim to the roaming inhabitants of Molaesmyr. Roll a d10 and consult the results below to see what perils the characters may encounter.
After the characters have succeeded on three of these checks, they find themselves approaching the looming tower of Caes Mosor, the heart of Molaesmyr and rumored source of the magical devastation. Alternatively, if the characters make five checks in total (failures or successes), they eventually wander towards Caes Mosor despite the setbacks they faced along the way.
Molaesmyr Hazards
Characters that move stealthily through the streets of Mosaelmyr can make a group Dexterity (Stealth) check. If they encounter a hazard that contains creatures, compare the roll of their group check to the passive Perception scores of the creatures. If half or more of the Dexterity (Stealth) checks meet or exceed the creatures’ passive Perception score, they avoid the encounter.
Spore Pods
On a roll of 1 or 2, the road they walk down is covered in fungal spore pods that explode with every footstep. All creatures within 10 feet of the front rank of their marching order must make a DC 17 Constitution saving throw or become poisoned for one hour.
Should the characters encounter this event multiple times, they can move at half speed through the spores to avoid activating them again.
Elf Spirits
On a roll of 3 or 4, four tormented elven spirits lurk in the shadows. These Molaesmyr elves are ancient spirits corrupted by the foul magic of the ruins. Three of these spirits are specters and their leader is a banshee that serves the hag coven.
Hostile Agriculture
On a 5 or 6, they are ambushed at an intersection by three vine blights and three twig blights that resemble patches of vines and dead bushes breaking through the ground. The vine blights wait for them to enter the radius of their Entangling Plants ability before attacking and the twig blights go after any restrainedcharacters.
Slick Surprise
On a 7 or 8, the characters wander into one of the boggle’s Oil Puddles. As the DM, you may choose which puddle befalls the characters.
Safe… For Now
On a 9 or 10, nothing happens.
In any of these encounters or at the DM’s discretion, the boggles can appear to cause further mischief if they haven’t already been defeated.
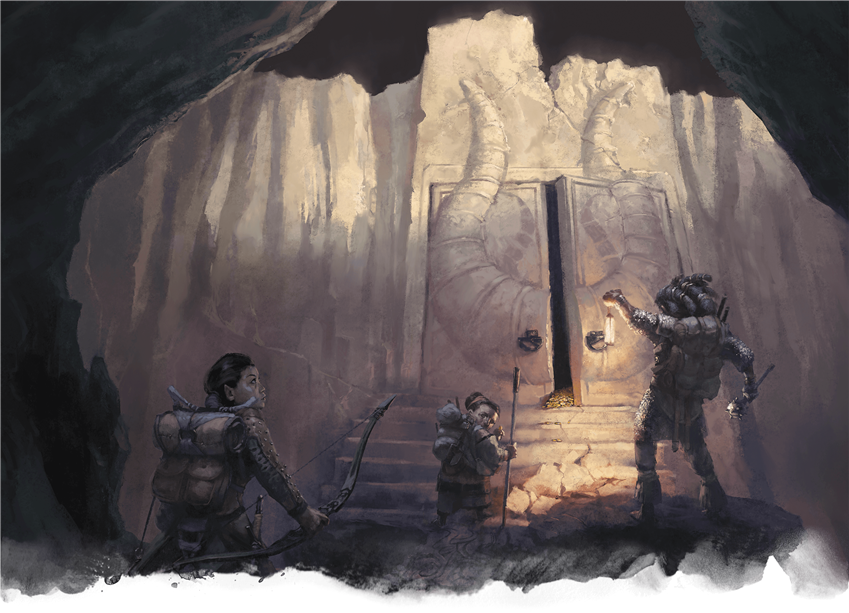
Caes Mosor
The stone door that leads into Caes Mosor is closed and locked. Picking the door’s lock requires a character to make a successful DC 20 Dexterity check with thieves’ tools, or it can be forced open making a DC 15 Strength check. Doing so makes a great deal of noise—though here, at least, noise doesn’t attract any creatures.
Inside the tower, each floor is 15 feet tall and 40 feet in diameter, and only the first and second floors are easily accessible via a circular staircase that curves to the left. The first floor contains only rubble and broken furniture. Characters that succeed on a DC 17 Intelligence (Arcana or Investigation) check notice that something is off about the wall underneath the stairs. It is illusory; behind the illusion is a passage that leads to a staircase that descends downwards into the labyrinth. There is nothing else of interest on this floor.
The second floor contains the remains of a sitting room and library and is quickly determined to be a “safe” place to rest, should the characters need to. Most of the books and furniture are also tattered and in ruins: the result of both time and past adventurers’ toll on the place, but one book on a half-buried desk is in pristine condition. If the characters take it, it turns out to be a spellbook with the following spells:
1st level: catapult, illusory script, silent image, unseen servant
2nd level: arcane lock, continual flame, misty step
3rd level: counterspell, hypnotic pattern
4th level: hallucinatory terrain, phantasmal killer
Navigating the Labyrinth
The labyrinth underneath Molaesmyr is a vast series of winding tunnels leading everywhere and nowhere. The hags have set themselves up in a chamber far from the entrance, and peppered the tunnels with their servants as protection. If the boggles are still alive, they can also cause mischief down here and continue to provide the hags with intel if they still have the hag eye—or the hags can spy on the characters if they took the hag eye themselves.
Because of the labyrinth’s incredible age, most of its tunnels have collapsed, turning this labyrinth into more of a twisting single passage. This allows the dungeon to be run without a map. However, if you wish to expand this dungeon with a map (such as one from appendix C of the Dungeon Master’s Guide), you can add additional encounters to the dungeon, such as inserting encounters the characters may have missed while they were navigating Molaesmyr above into the winding paths below.
1. The Entrance Chamber
Once down the staircase, the characters find themselves in a circular chamber about 30 feet in diameter. The walls around are worked stone, and the floor is dusty. Torches hang evenly spaced around the room, providing enough light for the characters to see by. Three paths lead from this room that are also torchlit, but it is not immediately clear the right direction they should take. A DC 16 Wisdom (Survival) check will spot several sets of small footprints leading down the center path that look like they were made recently. The other two paths wind for approximately 50 and 100 feet respectively before leading to dead ends.
2. The Bone Room
This room is larger than the entrance chamber. Bones of all sizes are stacked in several large piles around this 50-foot diameter chamber. In the middle of them, a yeth hound chews on what looks like a small humanoid. A DC 14 Wisdom (Perception) check shows that it is not the body of a child, but of a redcap that was down here guarding the hags with the hound. There are three more paths leading out of this room. Another DC Wisdom (Survival) check will reveal the left path to be the most recently traveled one. The other two paths connect to each other in a loop (unless you wish to use them to expand the dungeon further).
Allow the characters to come up with creative solutions to keeping the yeth hound out of their hair if they don’t wish to fight it. It is very intently chewing on the corpse, and will only attack them if they make sufficient noise. The bone piles are large enough to hide behind and can be skirted around with sufficient Dexterity (Stealth) checks.
One of the piles of bones contains a necklace of adaptation around the neck of one of the skeletons.
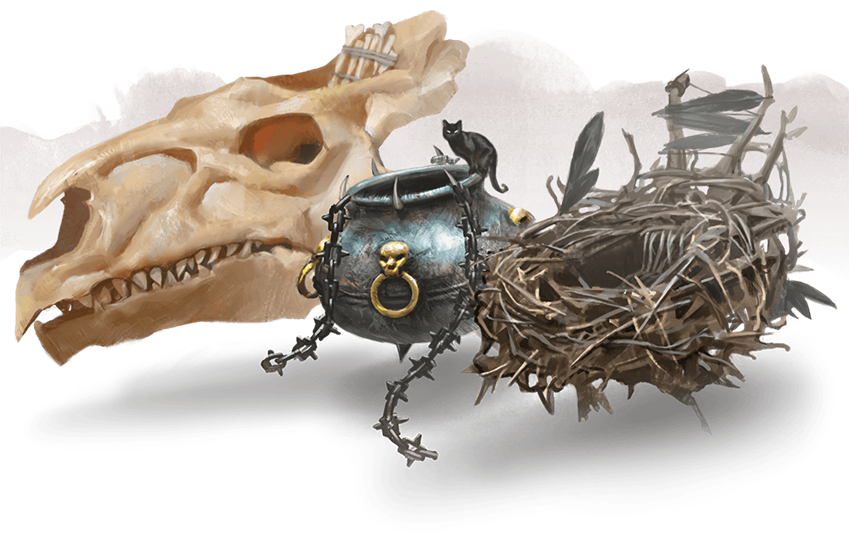
3. Den of the Hags
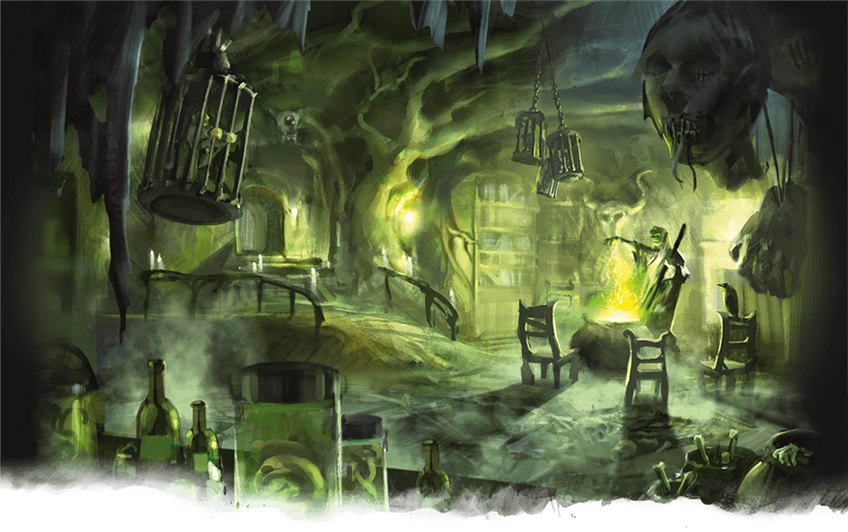
This tunnel extends and winds for 150 feet or so and gets brighter as the characters continue down it. Read or paraphrase the following:
This vast chamber is brightly lit by torches that hang all along the walls. To the immediate left of the entrance, a large cauldron rests on a fire, full of some foul smelling boiling liquid. To the far left, three makeshift beds made of wood and rotted material are pressed against the wall. In the middle of the room, there are a few empty wooden tables. To the right, ten cages in two rows line the wall. Three are open and empty, but the rest are closed and locked. Six of the cages contain more boggles, but the tenth cage contains a young tiefling girl lying on the floor of the cage, unmoving.
This chamber is 80 feet wide and 100 feet long. The encounter with the hags can differ depending on decisions made earlier in the encounter:
- If the characters did not find and destroy the hag eye and the hags have peered through it, the hags know they’re coming and are staging an ambush. They are within 30 feet of each other and invisible when the characters enter so that they’re able to cast their coven spells, which they have full access to.
- If the hag eye was destroyed, the hags have taken 3d10 psychic damage and are blinded. If they can’t see, they can’t use the following spells: hold person, phantasmal killer, polymorph, and eyebite, but the spell slots of these are still available to them.
- The leader of the hag coven, Granny Pustreat, wears a ring of free action that the characters can claim if they defeat her.
The hags may choose to turn invisible and lay low if they are blinded, or even attempt to escape if the characters leave the entrance unguarded; to survive today may mean an opportunity to take revenge in the future. If they fight, they will fight until defeated, and will give no care to avoid attacking the boggles in their cages; they have the means to make more if necessary.
A Successful Recovery
The locks on the cages are simple and easily broken. As the characters get closer, they can see that the boggles still have some childish features about them; these are the unfortunate children taken before Ahrisa, and the fate that the characters have helped her avoid. Inside the cage, Ahrisa is unconscious, but wakes after a while. Though young, she is well-spoken, and explains her predicament thus:
“I was playing under the watch of my guardian when I saw a little creature at the edge of the garden. I’d never seen anything like it before and it looked like it wanted to play, but when I got closer to it, it suddenly vanished and reappeared deeper into the forest! I knew I shouldn’t have followed after it, but I was so bored playing at home!
“The further into the forest I got, I was joined by more of them and before I knew what was happening, I was very far from home. A very kind-looking lady met us and brought me here—but she turned into a horrible monster and shoved me in this cage.”
If the characters search the hags’ corpses, they find ancient elven jewelry worth 200 gp on them. Likewise, the cauldron contains the means of turning the children into boggles: a dark concoction infused with the evil magics of Molaesmyr.
Conclusion
The characters return to Shadycreek Run with Ahrisa in tow, and the Mardoons are happy to have her back. If the characters tell what they found in the ruins, the families are concerned enough to send a small force back to Molaesmyr to ensure the threat is no more. The Mardoons augment any treasure found on their adventure with another 200 gp and a circlet of blasting, and the characters have the favor of the Mardoon family of Shadycreek Run.
You can continue your daring adventures through the land with Explorer’s Guide to Wildemount, coming to D&D Beyond on March 17th, 2020, with preorders available now. You can also keep up with the adventures across Wildemount in Critical Role, every Thursday at 7:00 pm PST on www.twitch.tv/CriticalRole.
Did you like this encounter? Check out the other encounters in the Encounter of the Week series, and preorder Explorer's Guide to Wildemount on D&D Beyond to get four starter adventures set in Wildemount—in the Menagerie Coast, Dwendalian Empire, Xhorhas, and the Greying Wildlands—including an adventure written by Matthew Mercer himself!
LaTia Jacquise is a contributing writer for D&D Beyond, Wizards of the Coast, and Adventurers League, as well as one of the Community Managers for the D&D Adventurers League Organized Play program. Based in Chicago and a self-proclaimed “Forever DM”, she frequently travels to conventions across the Midwest to bring her love of D&D to as many people as she can. You can find her spending entirely too much time on Twitter at @theladytiefling.
-
View User Profile
-
Send Message
Posted Jan 27, 2020But really though, my goal as a dm is to have my characters fight each type of hag. So far they have only battled a night hag, a bheur hag, and a coven of sea hags. This should be fun!
-
View User Profile
-
Send Message
Posted Jan 27, 2020I love it. Keem em coming LaTia.
-
View User Profile
-
Send Message
Posted Jan 27, 2020I have covered all the hags with my group. Even had them make a deal with a "hag mother" to save the soul of a child kidnapped in their first adventure to keep her from being hagged on her 13th. Two PCs agreed to remain in the Fey Wild with the hag mother for a set amount of time. They still don't know what all they did there and I had a random table of fey wild-touched things happen to them the first week they were home.
Players loved it and took on temp characters while their main PCs were away.
-
View User Profile
-
Send Message
Posted Jan 28, 2020A question on spelling, the official Critical Role wiki has the name spelled Mardun, not Mardoon. Is the latter the spelling found in the book?
-
View User Profile
-
Send Message
Posted Jan 28, 2020The hags will eat us all
-
View User Profile
-
Send Message
Posted Jan 28, 2020Can we get some more Baldurs Gate encounters that are levels either 1, 2, 3, 4 or maybe 5 so i can share it with my players. maybe something in the high city of Elturiel and some demons or devils that came with the city to the material plane. Just an idea to ponder. Also a map of Elturiel as a city that is not being dragged into the Nine Hells and has a functioning society with a decent civilian population.
-
View User Profile
-
Send Message
Posted Jan 28, 2020Unfortunately, Encounter of the Week won't be returning to Baldur's Gate for the foreseeable future. I highly recommend Baldur's Gate: City Encounters, on the DM's Guild, if you're in search of more action in the scummy streets of the Gate.
-
View User Profile
-
Send Message
Posted Jan 28, 2020Mardoon is the correct way to spell the name of the crime family found in Shadycreek Run.
-
View User Profile
-
Send Message
Posted Jan 28, 2020This is a fun encounter. Very atmospheric, especially with the fog shrouded ruins and the phantom laughter of children and a hag out there making illusions of the missing children to spook the players. All very well done. I hope to see more adventures by LaTia Jacquise!
-
View User Profile
-
Send Message
Posted Jan 28, 2020When using the coven rules, if you need to make the encounter a little harder, forget about eyebite and lob a 6th level [spell[lightning bolt[/spell] at the party. And, if necessary, 5th, 4th, and 3rd level bolts too.
-
View User Profile
-
Send Message
Posted Jan 28, 2020Weirdly, your Eyebite link showed as "[Tooltip Not Found]" when I read your comment, but when I clicked the "Quote" button, the link text shows up properly in the block quote.
-
View User Profile
-
Send Message
Posted Jan 29, 2020I love any encounter in which I can work in fey! It always catches my parties off guard. Thank you very much!
-
View User Profile
-
Send Message
Posted Jan 29, 2020Such a good adventure! Love your work LaTia!!!
-
View User Profile
-
Send Message
Posted Jan 30, 2020Dope one-shot! Well done!
-
View User Profile
-
Send Message
Posted Feb 1, 2020be very very very VERY CAREFUL taking loot from hags and or their lairs. what you take might not do what you thought it would do, could end up a newt.
-
View User Profile
-
Send Message
Posted Feb 4, 2020In philosophical terms it's just like
Elysian fields in dialogs of Plato just kiddy! I'm ready to battle any thing.
-
View User Profile
-
Send Message
Posted Feb 8, 2020Seems great! Keep up the good work!
-
View User Profile
-
Send Message
Posted Feb 10, 2020I LOVED IT!!!
-
View User Profile
-
Send Message
Posted Mar 13, 2020Were the sea hags in the Haloween Encounter, "The Banderhobb Coven?" Link: https://www.dndbeyond.com/posts/344-halloween-encounters-the-banderhobb-coven
-
View User Profile
-
Send Message
Posted Mar 13, 2020This encounter looks great! I'll definitely try to fit it into a future campaign.